Appearance
How to create seats
Add the seats in your library so you can book members into them. You can add one seat, a whole row at once, or import a list.
Who can do thisOwner, Org admin by default, or any staff role given Seats → Create / delete / categories in Settings → Staff role permissions.
Before you start
- Every seat needs a Type Tag (used for pricing and filters) and a Category (such as a floor or hall). Your library starts with a default tag and category, so you can begin right away. See How to add seat categories and tags.
- You can only book seats during your library's opening hours.
Where seats live
Open Seats in the left menu. Manage Seats shows every seat as a card.
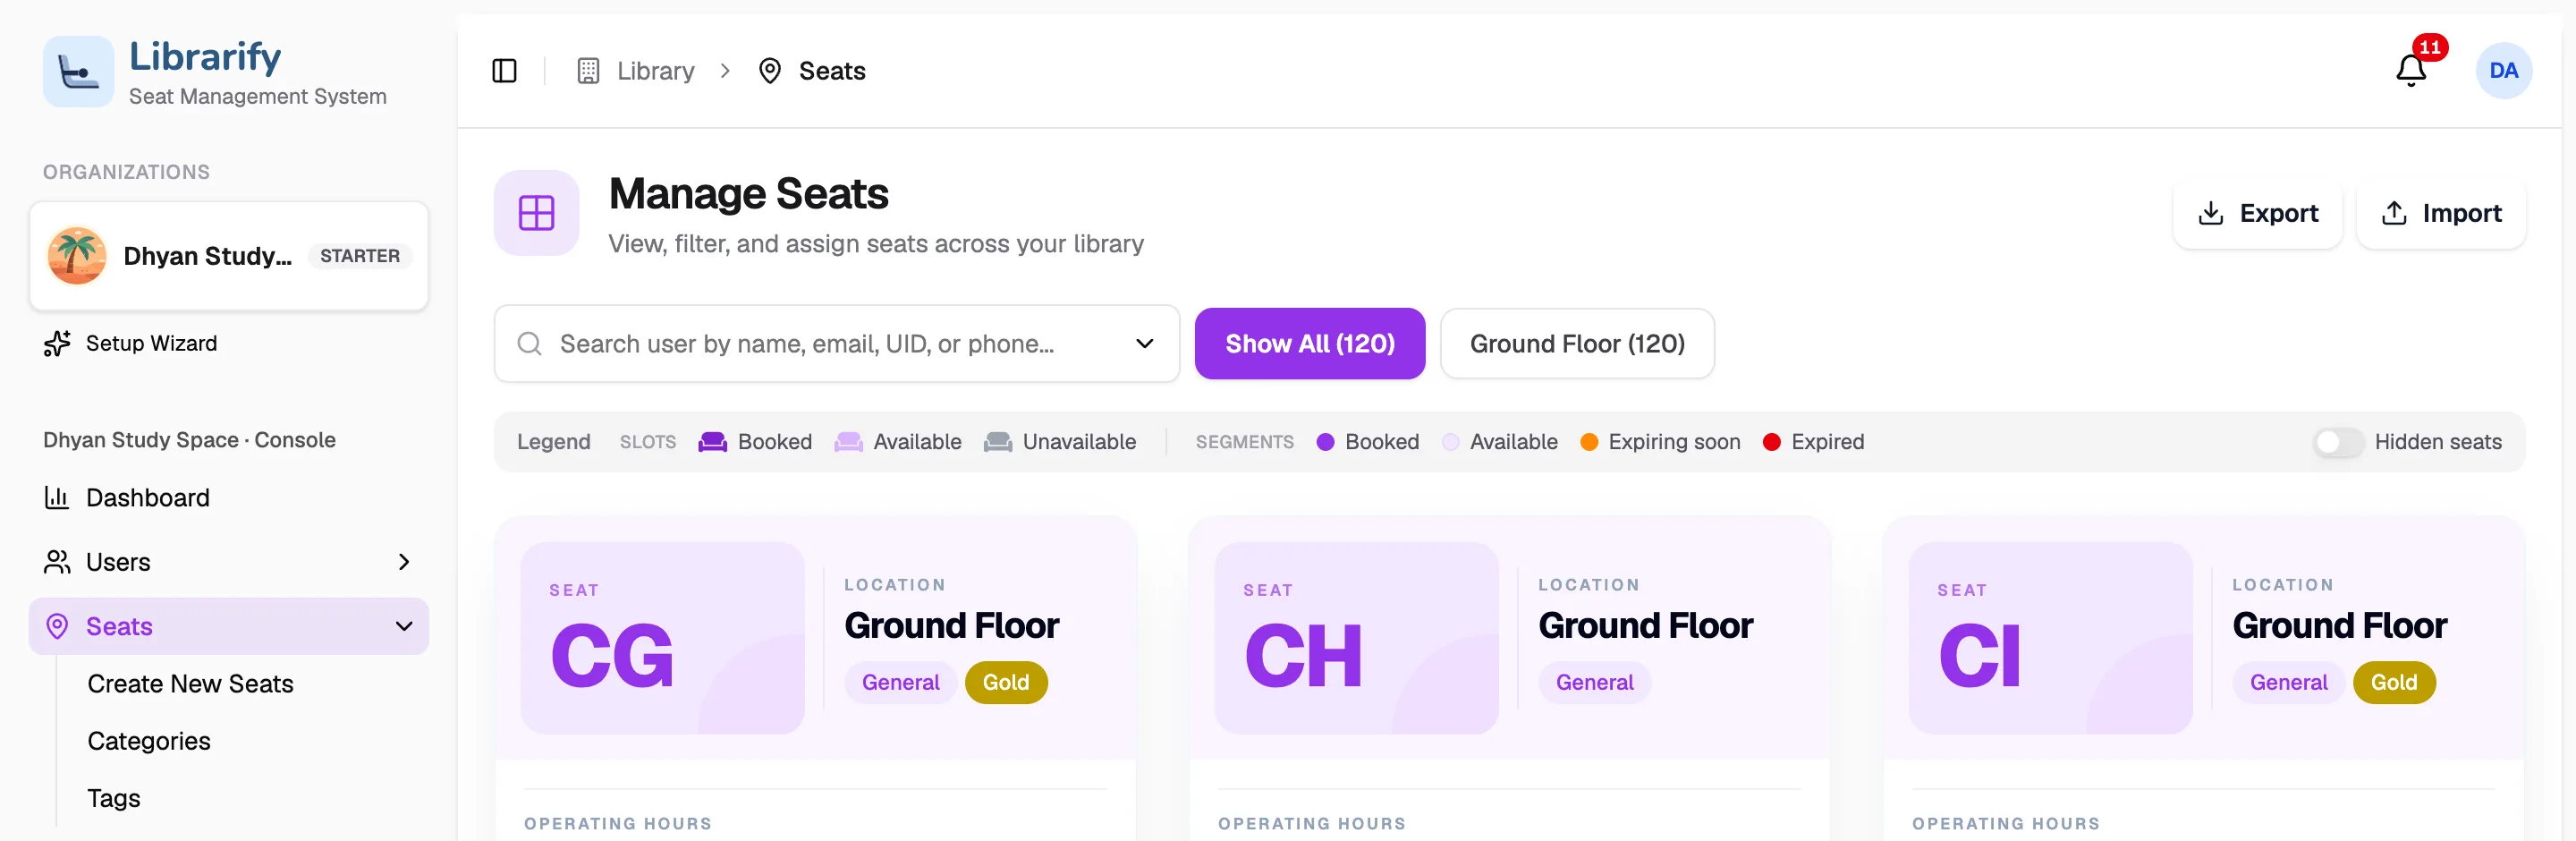
- Create New SeatsAdd one seat or a whole row
- FiltersShow all seats or one category
- ImportAdd seats from a CSV file
- ExportDownload your seat list
Add one seat
- In the left menu, click Seats → Create New Seats.
- Keep Single Seat selected.
- Enter a Seat Label, for example
A1. Each label must be unique in your library. - Choose a Type Tag. Only one of a seat's tags can have special pricing, and only one can have a colour.
- Choose a Category.
- Optional: tick Enable Hourly Booking if members can book this seat by the hour.
- Click Create Seat.
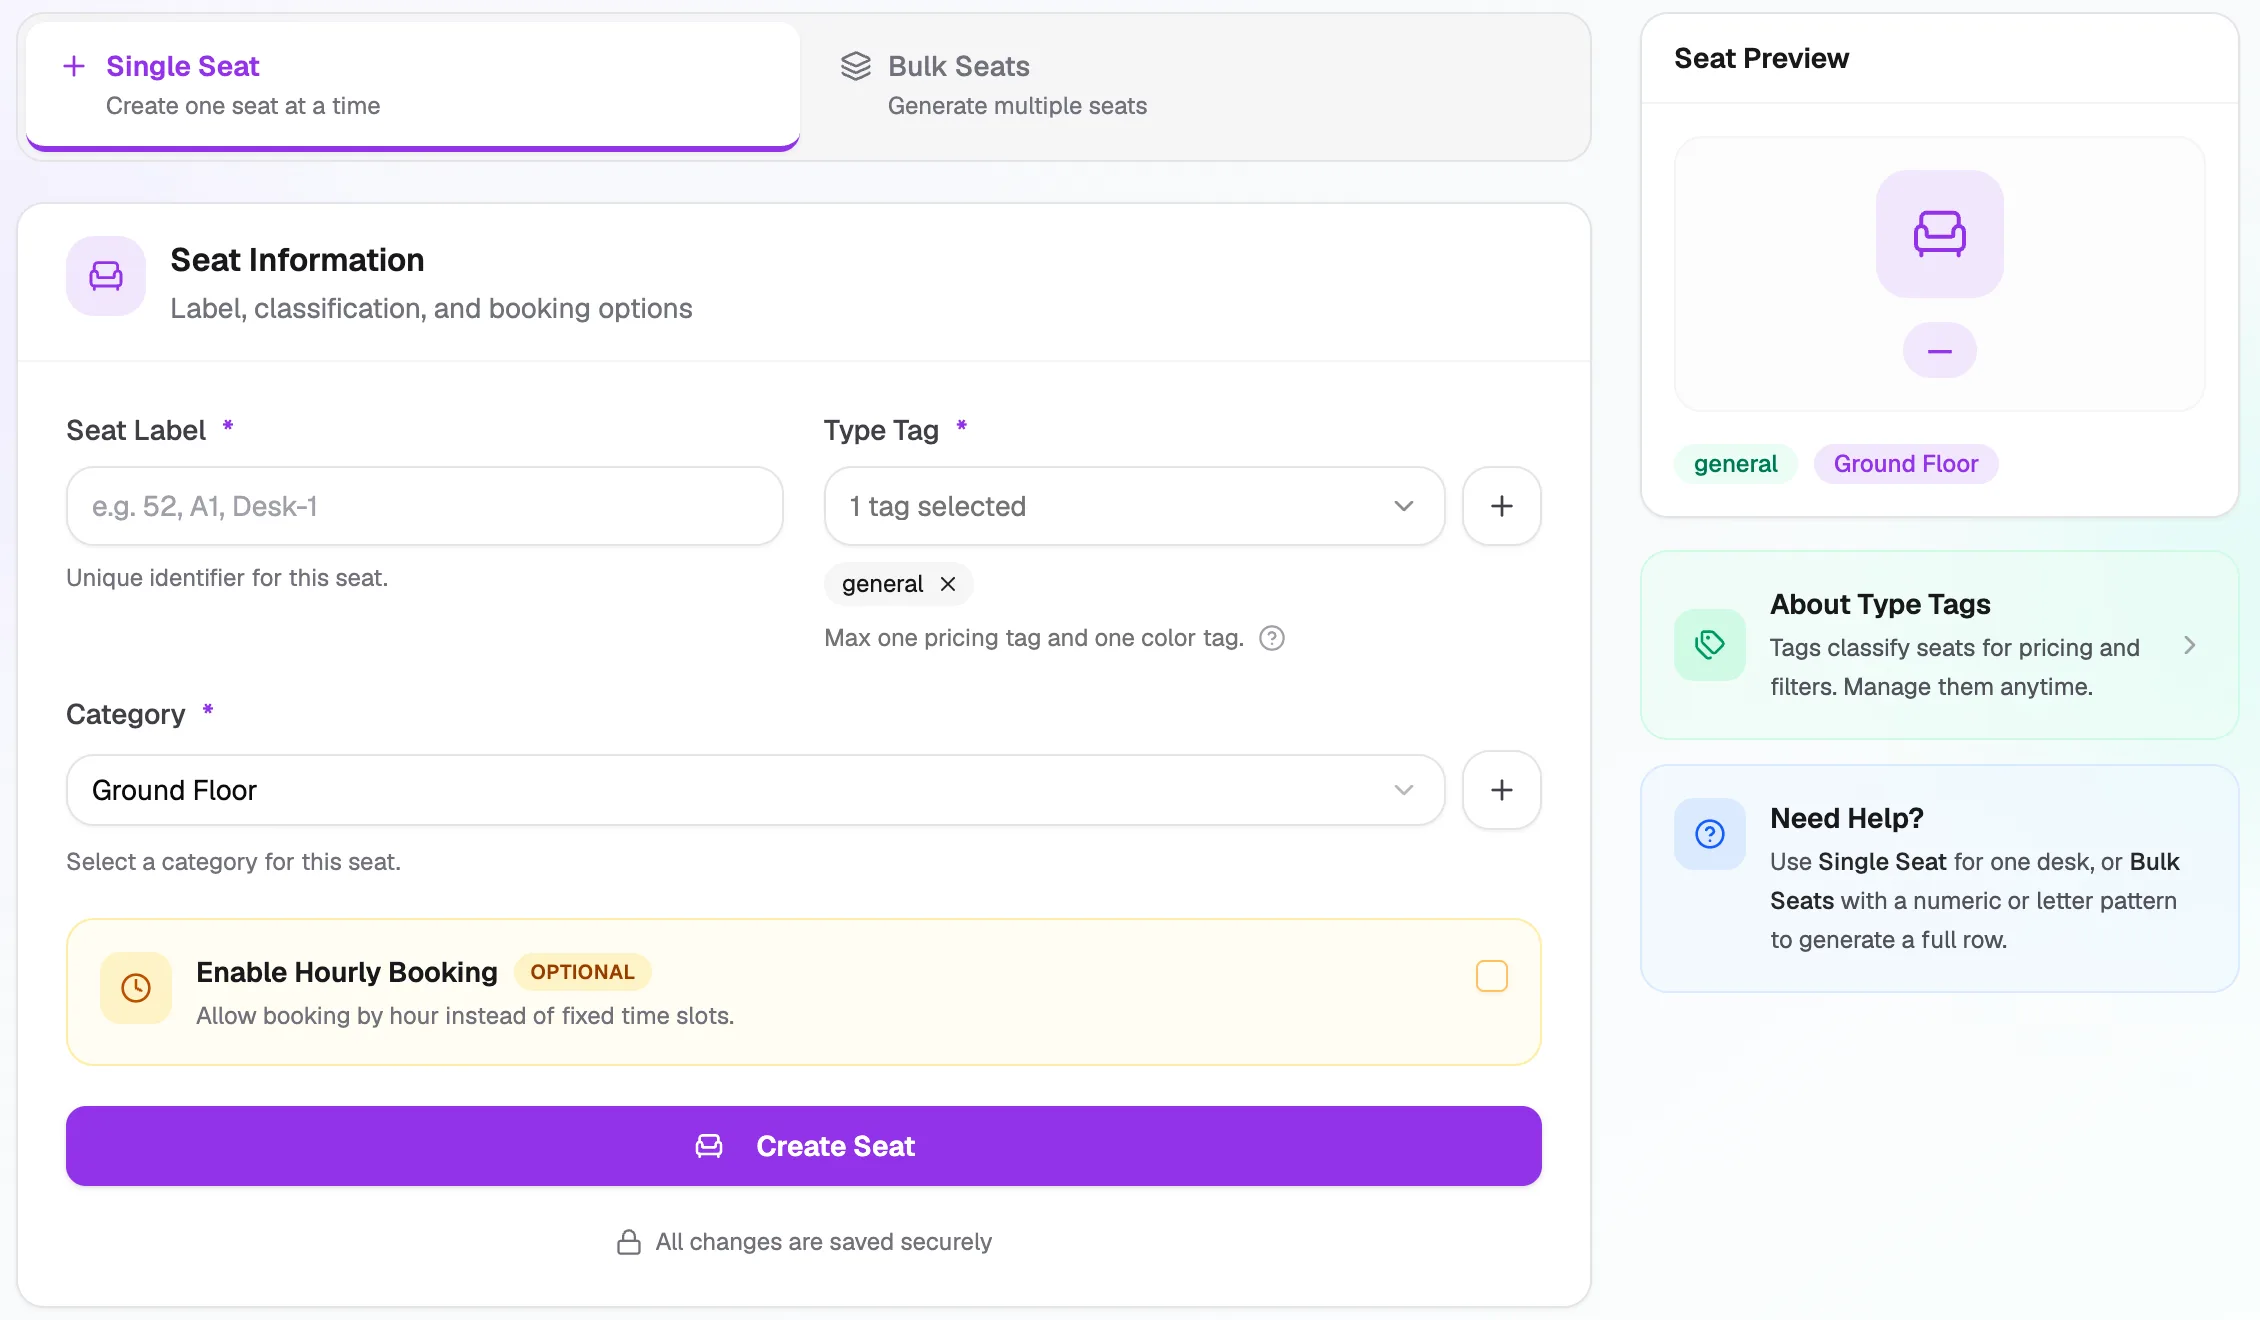
- Seat LabelUnique name, such as A1
- Type TagSets pricing and filters
- CategoryFor example a floor or hall
- Enable Hourly BookingOptional: allow bookings by the hour
Add many seats at once
Use Bulk Seats to create a full row with a pattern, such as 1–50 or A1–A20.
- On Create New Seats, click Bulk Seats.
- Enter the Number of seats, from 1 to 1000.
- Choose a Label type: numbers, letters, or letters with numbers.
- Enter the Starting value, the first label in the row. It must match the label type. The preview shows the labels that will be created.
- Choose the Type Tag and Category for every seat in this batch, and optionally Enable Hourly Booking.
- Click Generate Seats.
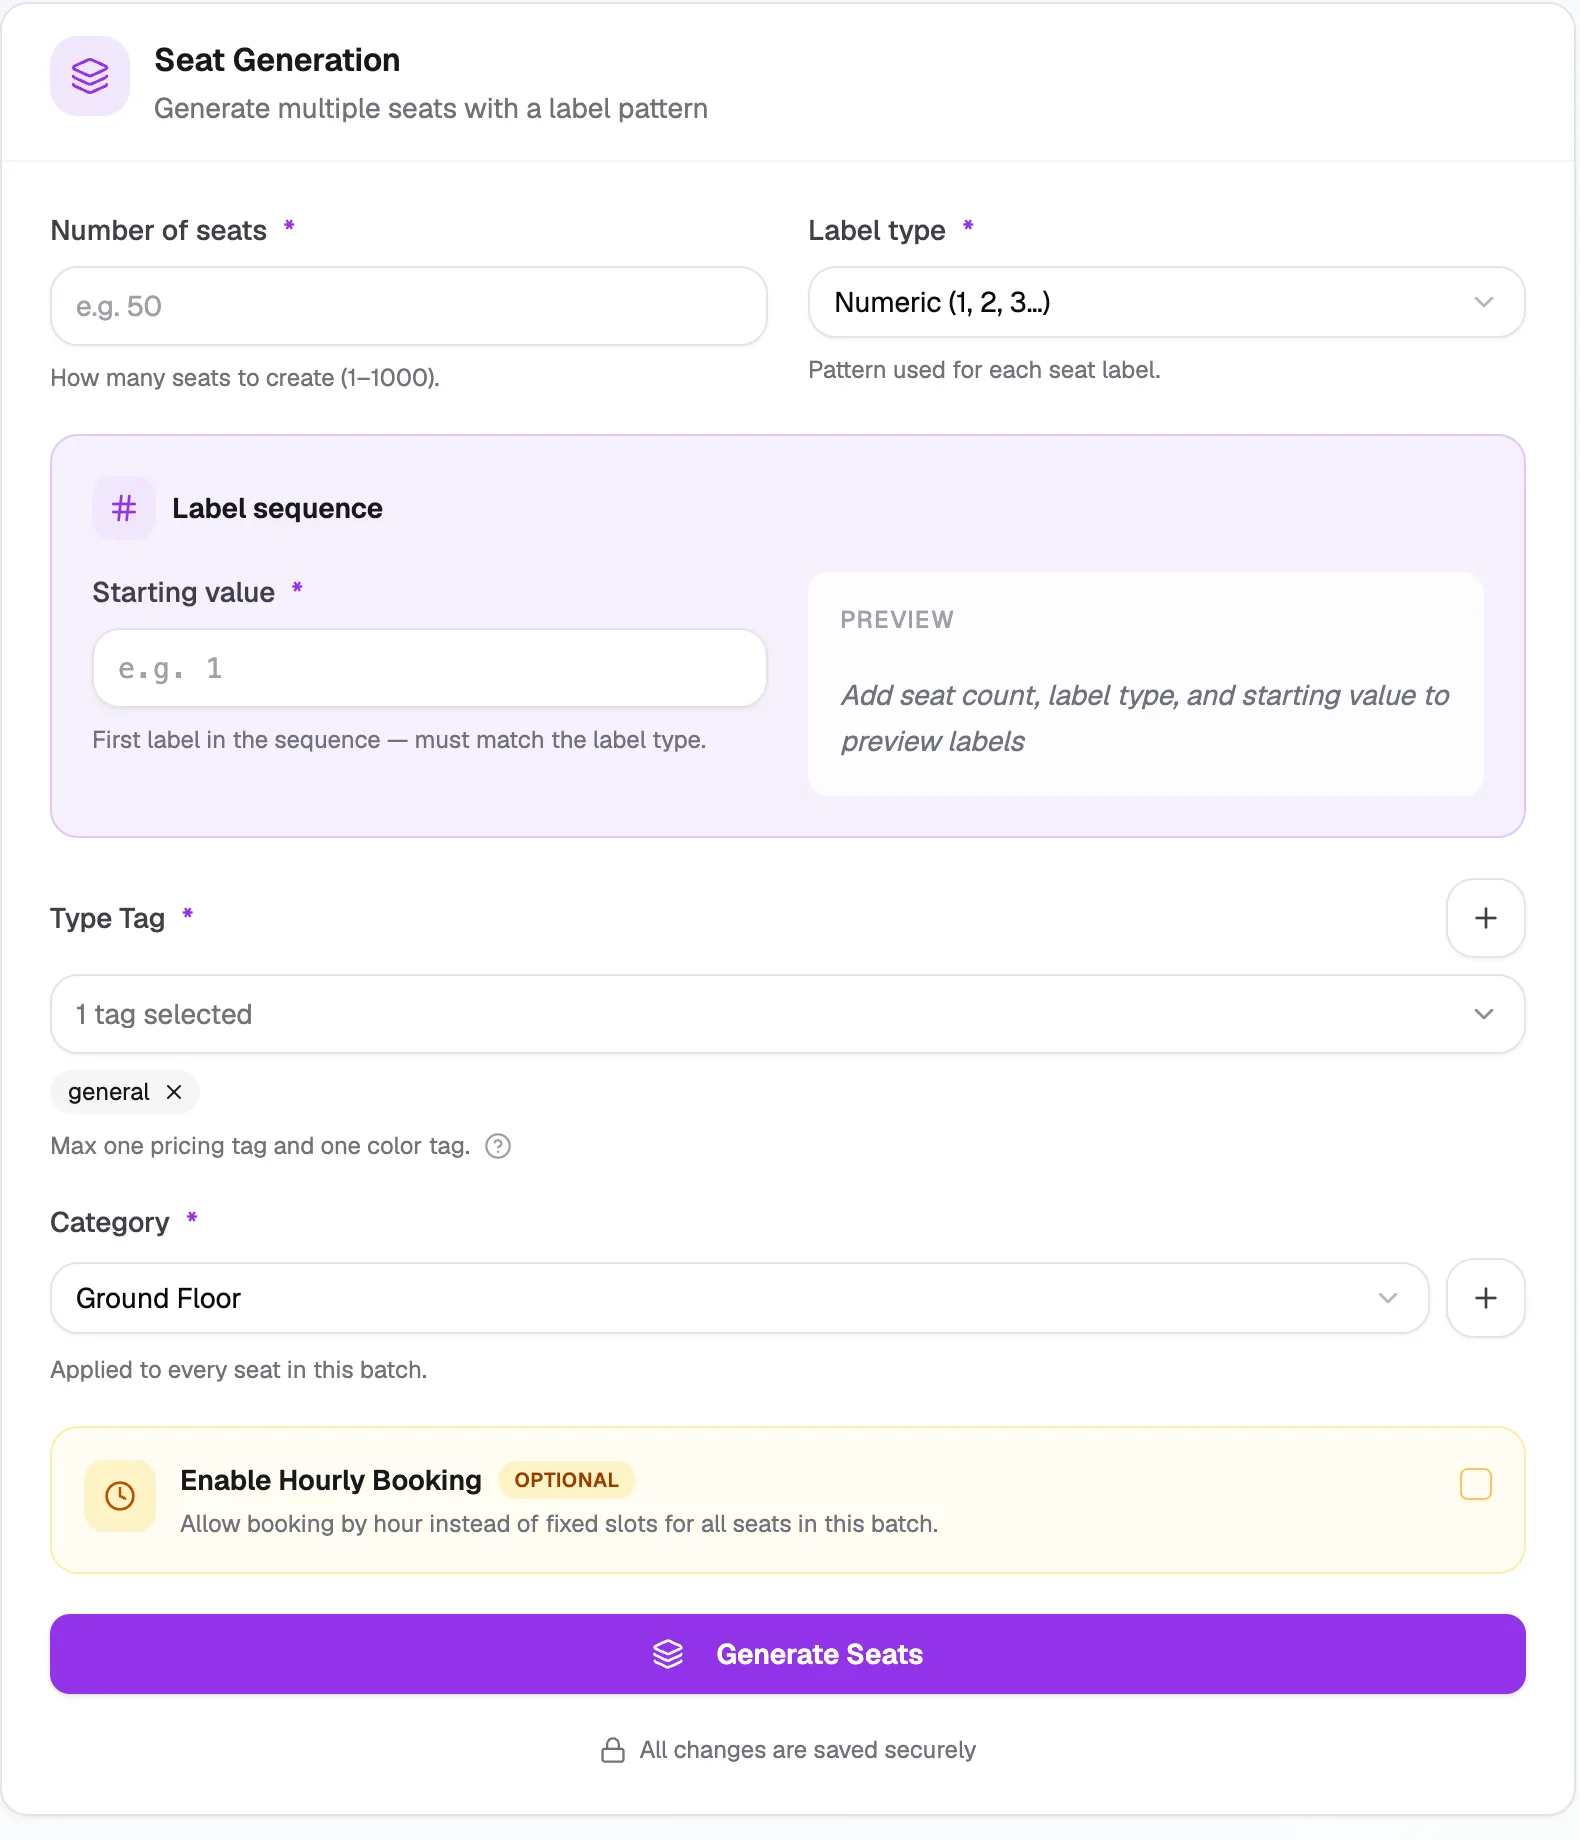
- Number of seats1 to 1000 in one go
- Label typeNumbers, letters, or both
- Starting valueThe first label, e.g. 1 or A1
- Generate SeatsCreates the whole row
Import seats from a CSV file
- On Manage Seats, click Import.
- Click Download template and fill it in, one seat per row (up to 500 rows).
- Click Upload CSV, choose your file, then click Submit.
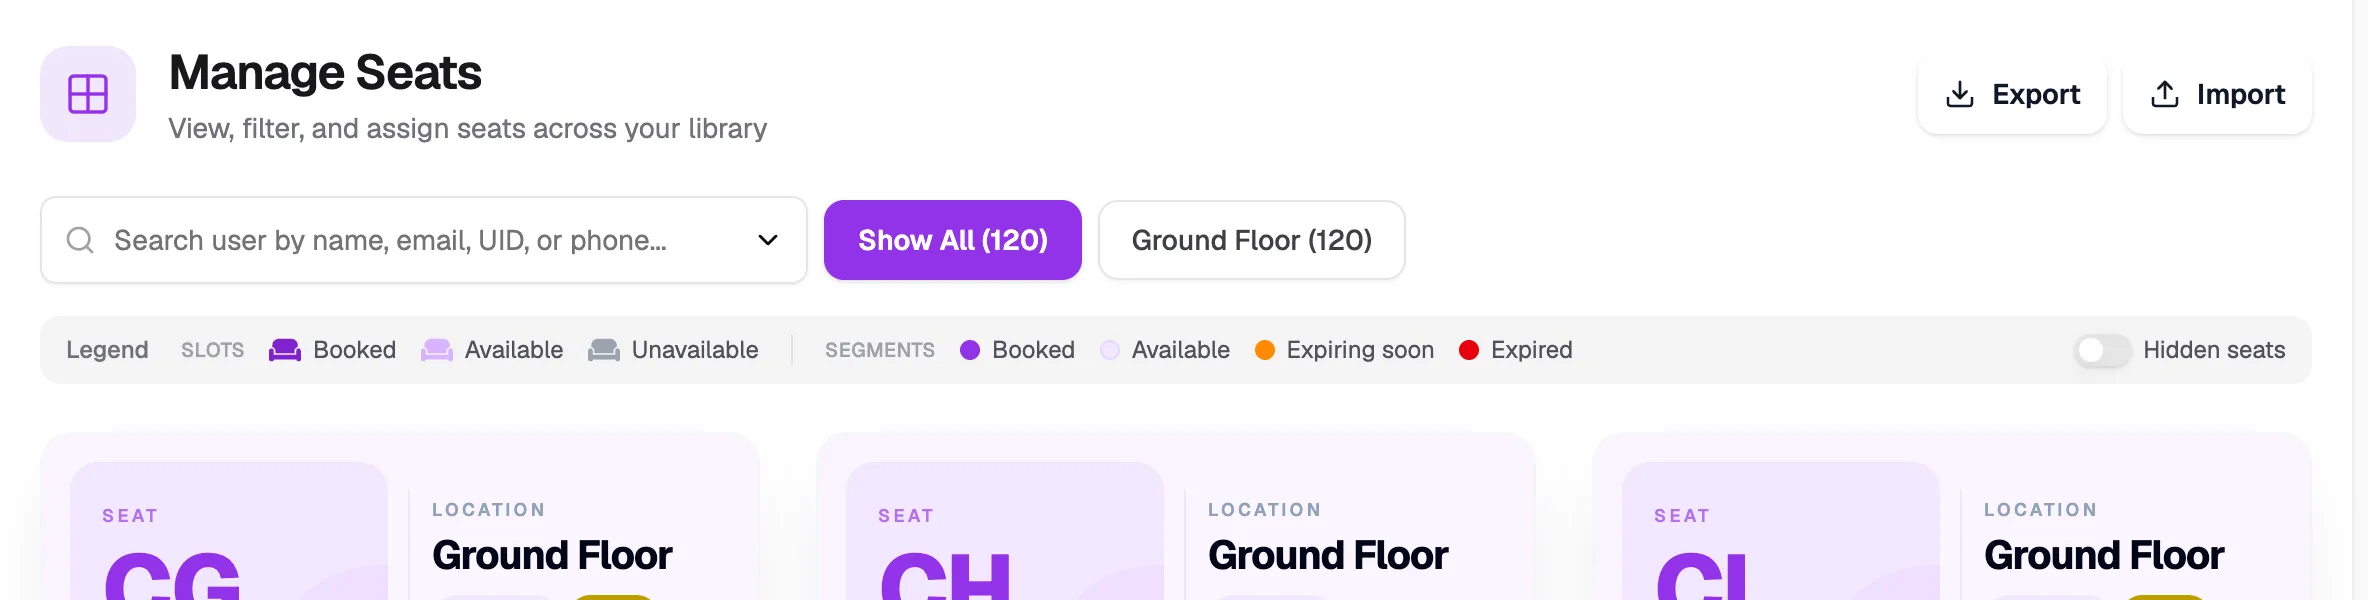
Click Import Then download the template, fill it in and upload it.
Import only creates seats. Create your tags first. Slots and bookings are set up separately.
Edit a seat
- On Manage Seats, click the seat's card.
- In Edit Seat, change the Seat Label, Tags, Category or Enable Hourly Booking.
- Click Update Seat. The button becomes active once you change something.
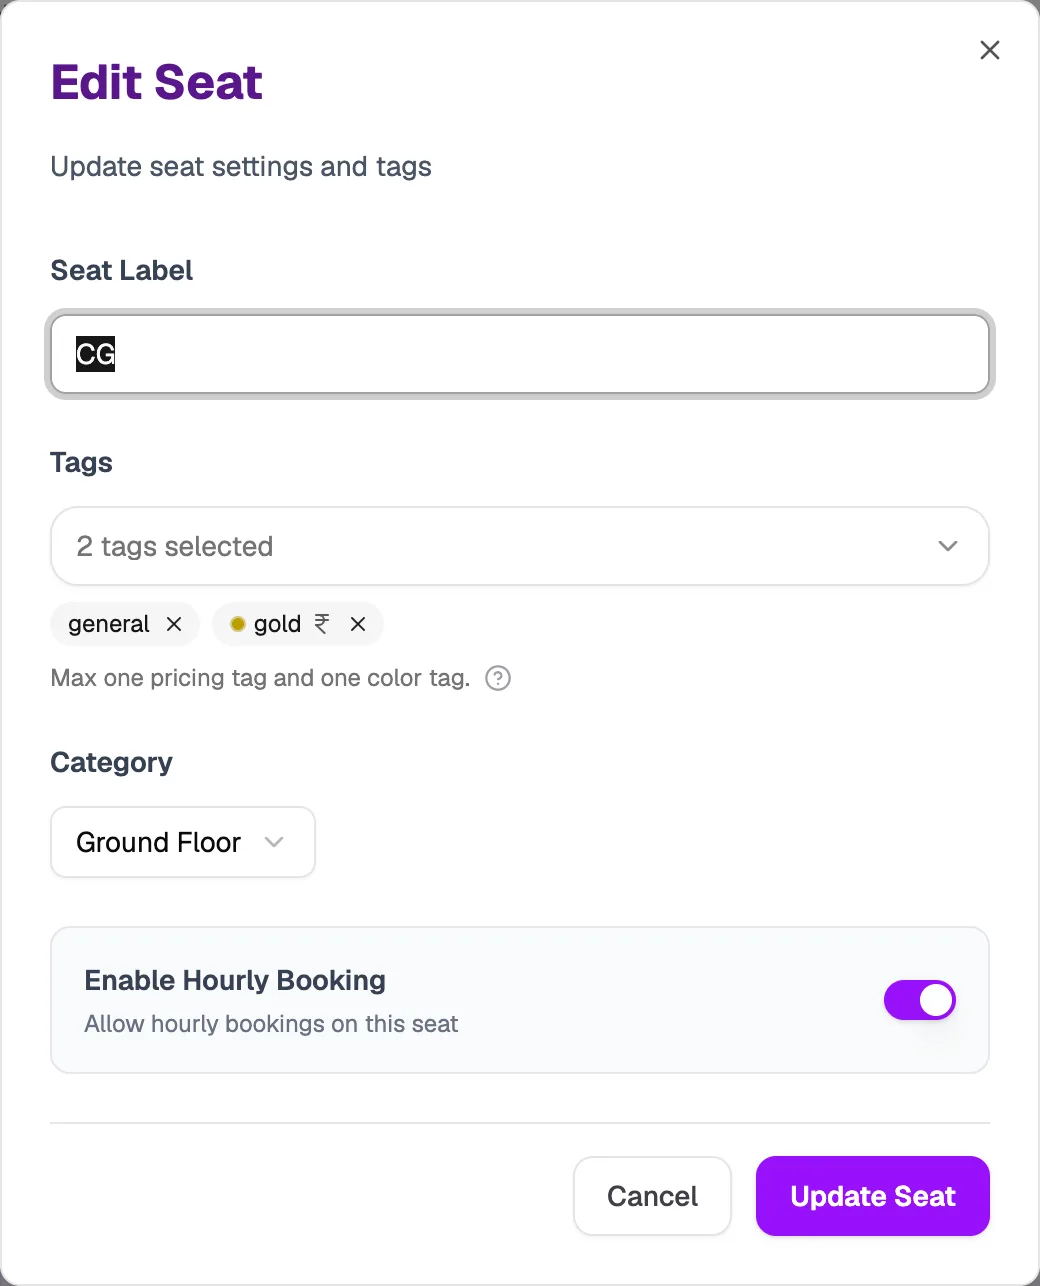
- Seat LabelRename the seat
- CategoryMove it to another floor or hall
- Enable Hourly BookingTurn hourly booking on or off
- Update SeatSaves your changes
What happens next
New seats appear on Manage Seats straight away and can be booked in any of your slots.