Appearance
How to send announcements to your members
Announcements are notices for your library, such as a holiday, maintenance or a new offer. Members see them in their inbox and under the bell on your library's site.
Who can do thisOwner, Org admin by default, or any staff role given Announcements → Create / publish in Settings → Staff role permissions.
See your announcements
In the left menu, click Announcements. The cards at the top show how many you've published or scheduled and how many people they reached. Use the tabs to see Published, Scheduled, Drafts or Expired ones.
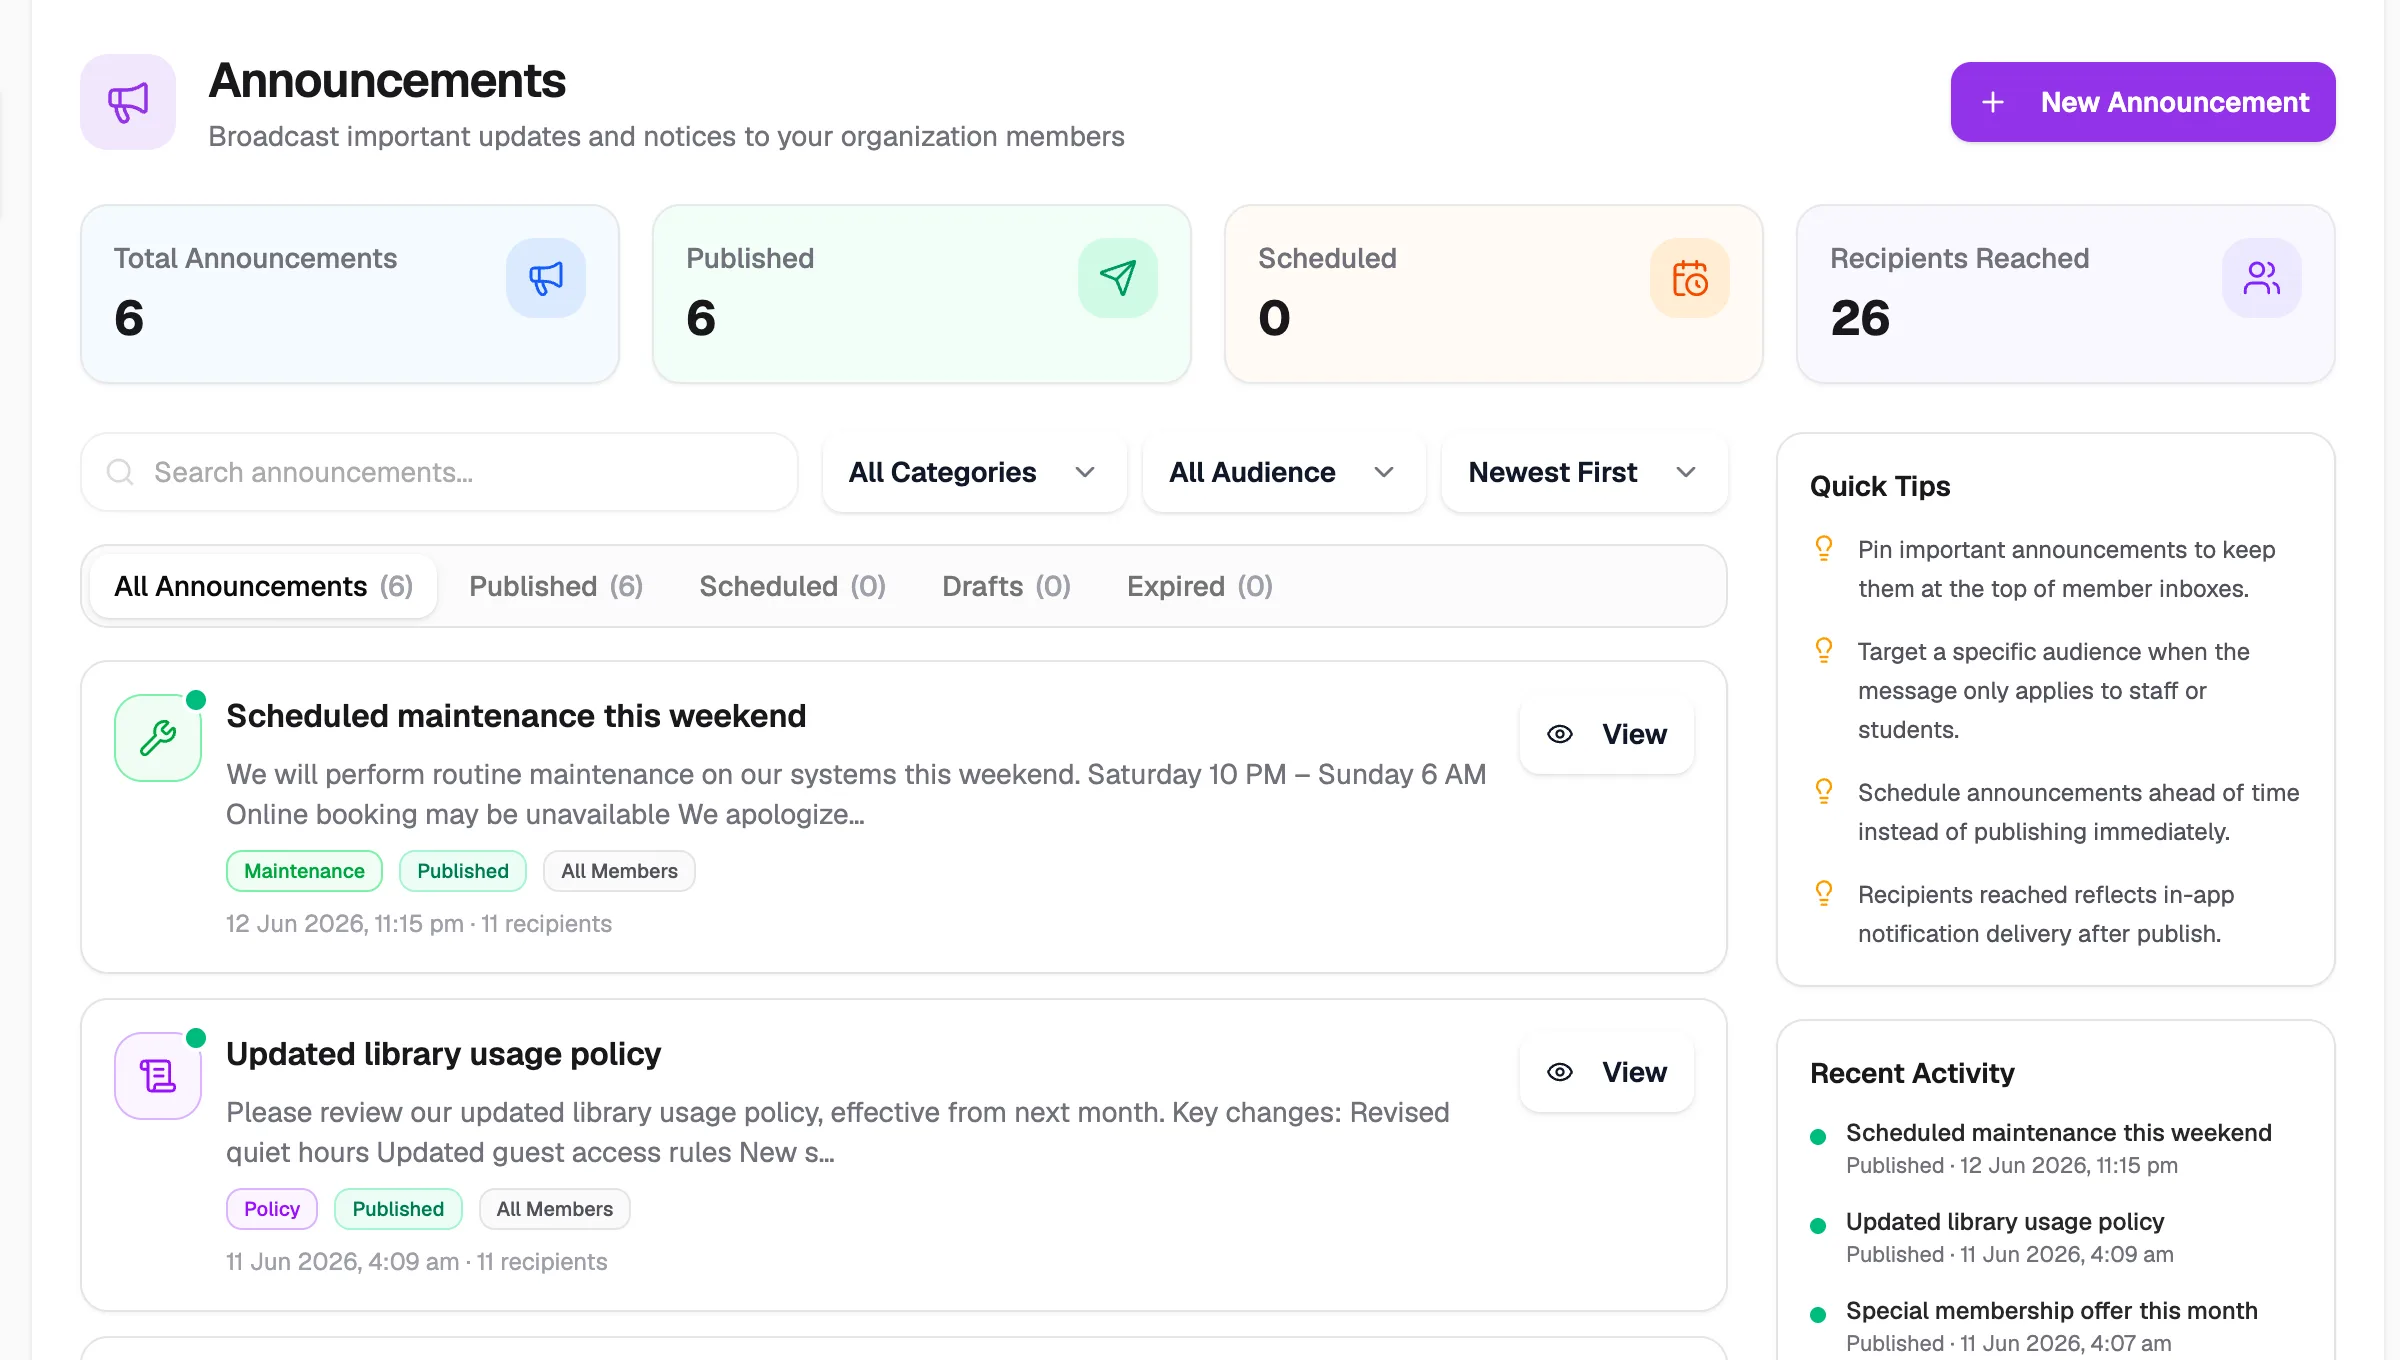
- New AnnouncementWrite a new one
- Recipients ReachedPeople who got them
- Status tabsPublished, scheduled, drafts
- ViewRead, edit or delete
Write an announcement
- Click New Announcement.
- Choose the Announcement Type: General, Maintenance, Event, Policy, Alert or Promotion.
- Enter a Title (up to 100 characters) and the Message (up to 2,000). You can use bold, italics, lists and links.
- Choose the Audience:
- All Org Users: everyone in your library.
- Staff Only: your admins and moderators.
- Students: members with the student role.
- Custom: type the email addresses of the members it's for.
- Choose the Priority: Low, Medium, High or Critical.
- Optional: add a Call To Action button with a Button label and Button URL.
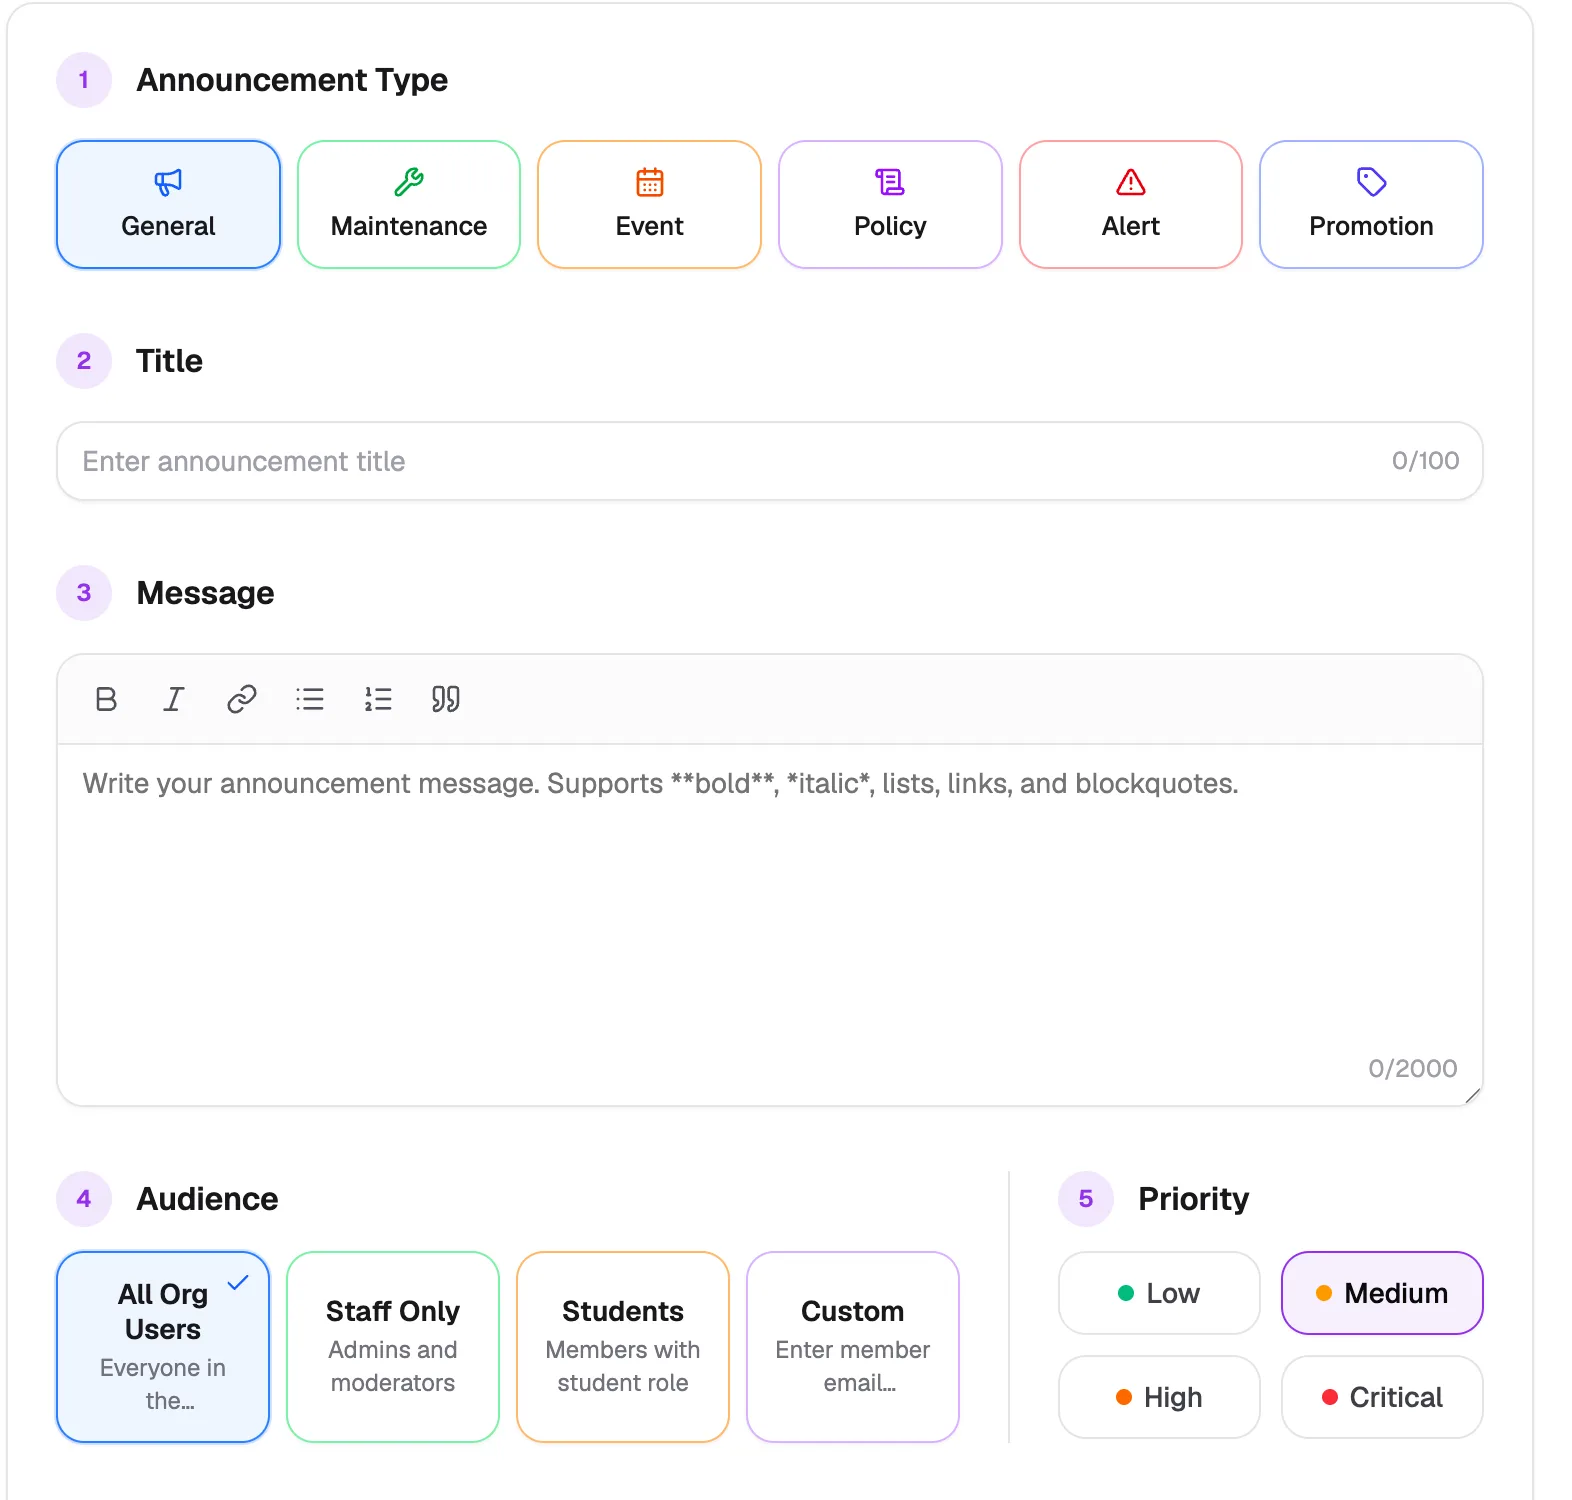
- Announcement TypeSets the label and icon
- TitleUp to 100 characters
- MessageBold, lists and links work
- AudienceEveryone, staff, students or chosen members
- PriorityLow to Critical
Schedule or pin it
- Under Schedule (Optional), set Start publishing to send it later, then click Schedule (see below). Set Expires at to hide it after a date.
- Turn on Pin this announcement to the top to keep it first in members' inboxes.
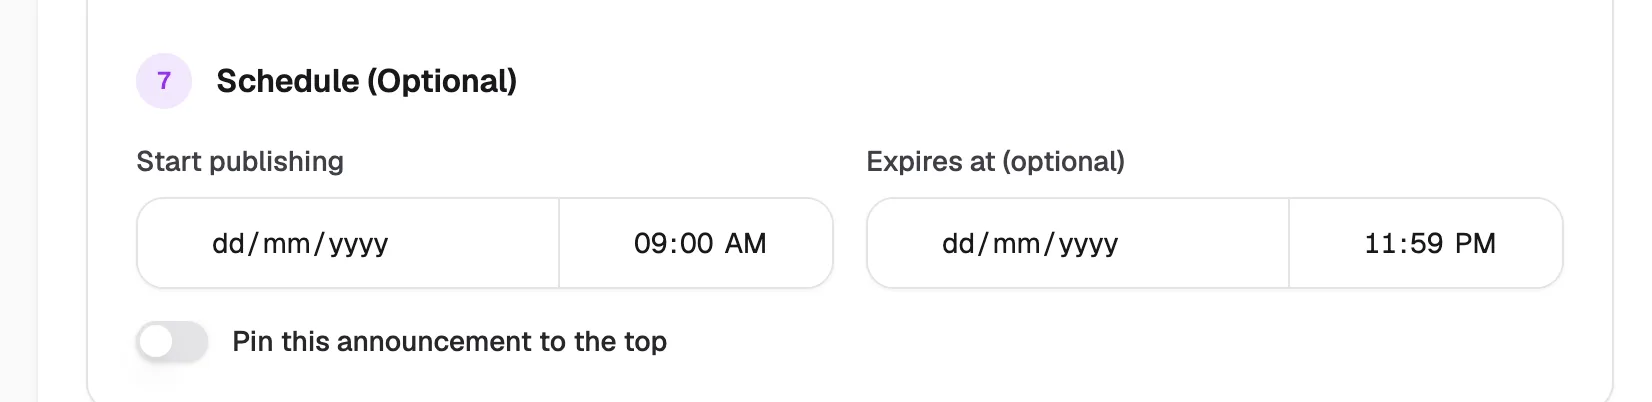
- Start publishingThen click Schedule
- Expires atOptional end date
- Pin to the topStays first in the inbox
Choose how it's delivered
Under Advanced Options on the right:
- Show in notification center / inbox (on by default): members see it in their inbox and under the bell.
- Send push notification can be ticked, but browser push notifications aren't sent yet.
- Send email notification is marked "Coming soon".
Publish
- Click Publish now to send it straight away. Publish now ignores any Start publishing time.
- To send it later, set Start publishing and click Schedule. It goes out at that time.
- Click Save draft to keep it without sending.
Check the title, audience and message before you publish. Members get it in their inbox if Announcement published is turned on for In-app in Notifications. As the owner, you get a copy too.
Edit or delete
Click View on an announcement to read it. Drafts and scheduled announcements can still be edited. To delete one, confirm Delete announcement?. It's removed permanently.