Appearance
How to use the setup wizard
The setup wizard gets a new library ready in four steps. It opens by itself after you create a library, and you can come back to it any time.
Who can do thisOwner, Org admin by default, or any staff role given Org Settings → Manage in Settings → Staff role permissions.
Open the wizard
- It opens straight after you create your library.
- To open it later, click Setup Wizard in the left menu: under your library's name, or under Settings. If you run several libraries, open the right library first.
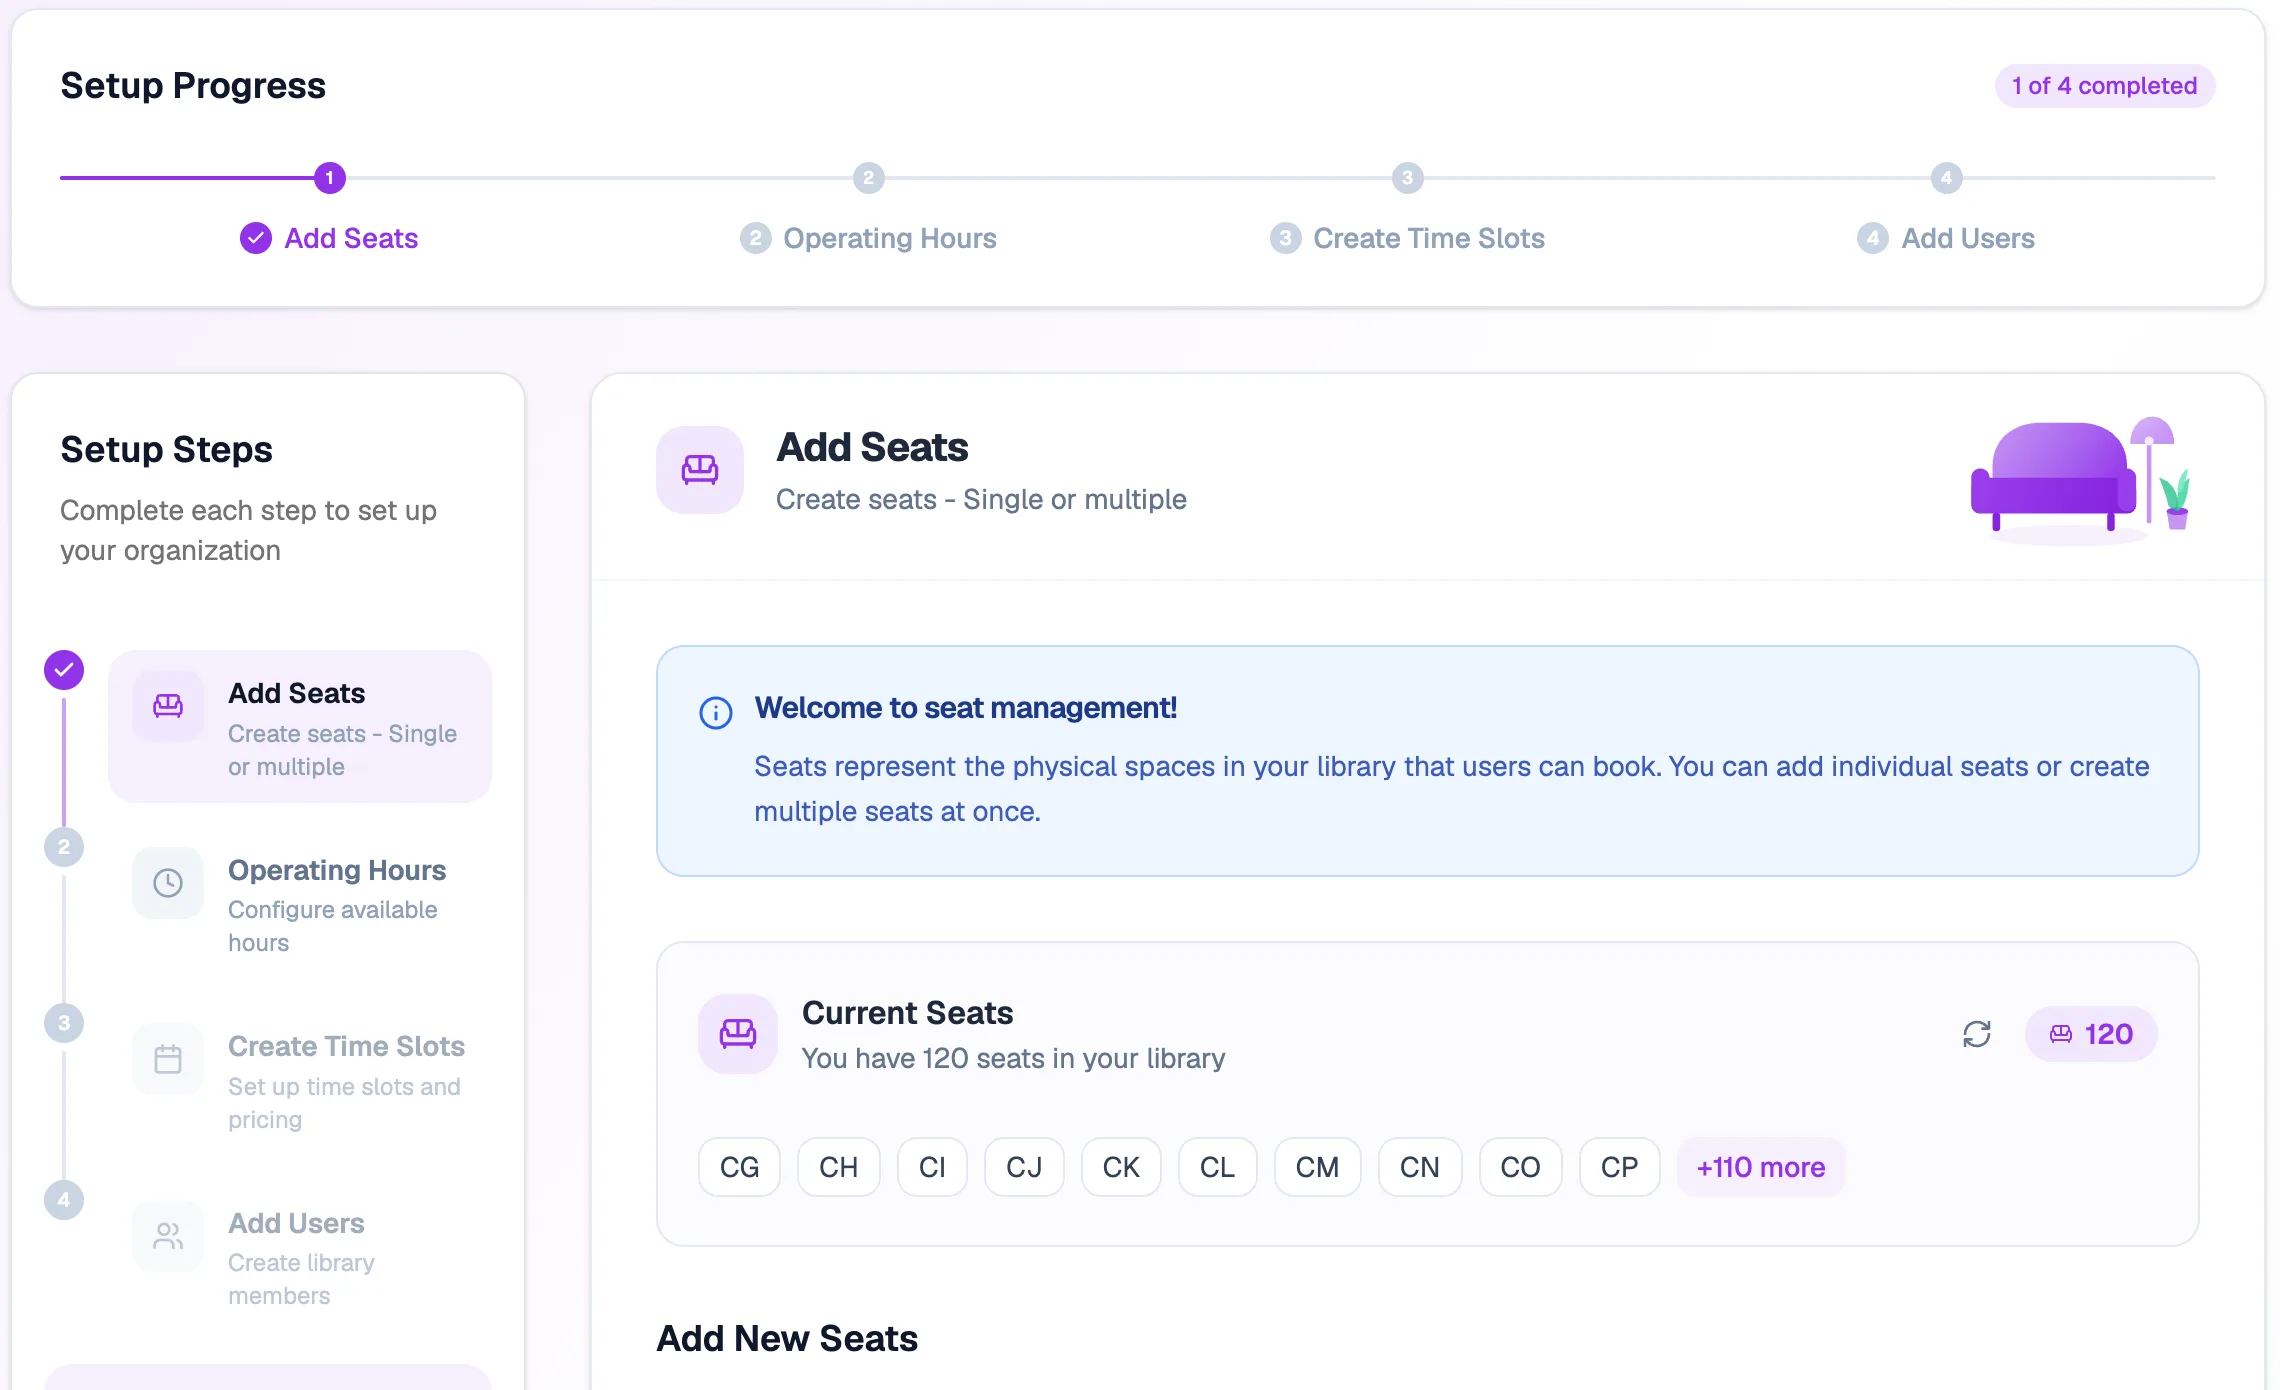
- Setup ProgressHow many of the 4 steps are done
- Setup StepsClick a step to open it
- Current stepFill in this step, then move on
Steps unlock in order: finish one, or click Skip for now, to open the next. Click Exit Setup at the top right to leave and come back later. Your progress is saved.
Step 1: Add Seats
Add the seats in your library, one at a time (Single Seat) or a whole row at once (Bulk Seats). It works like the seat form. See How to create seats.
Step 2: Operating Hours
- Drag the Opening Time and Closing Time sliders to when your library opens and closes.
- Optional: enter an Hourly Rate in ₹. Librarify uses it to price slots automatically.
- Click Save, then Next.
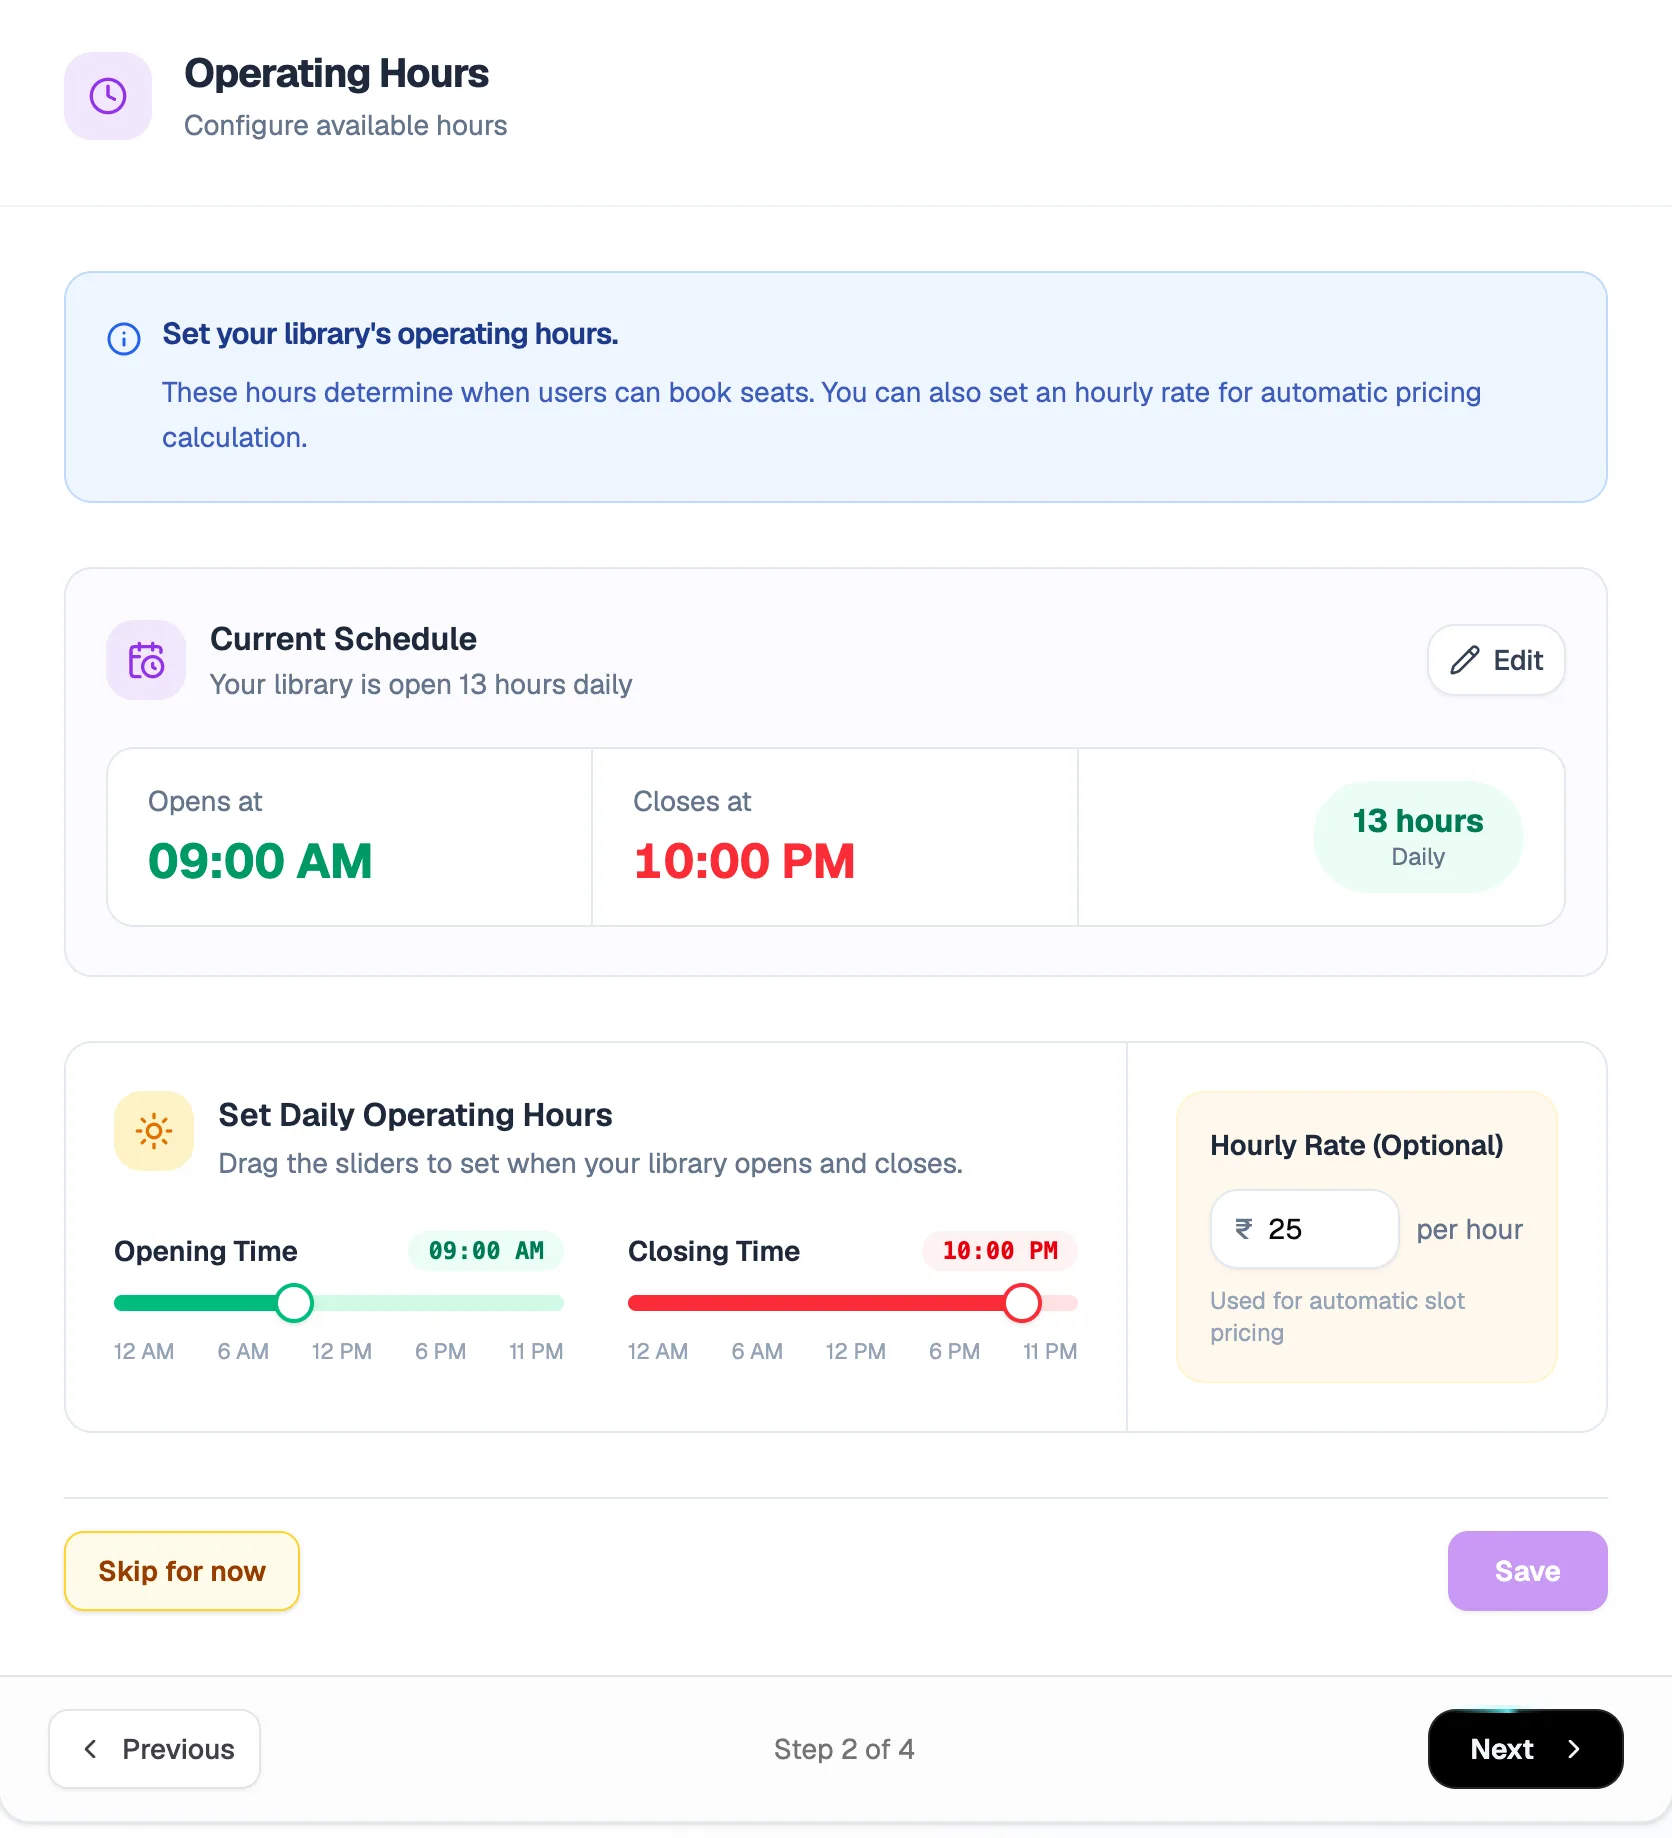
- Opening TimeDrag to when you open
- Closing TimeDrag to when you close
- Hourly Rate (Optional)₹ per hour, for automatic slot pricing
- SaveSaves your hours
Step 3: Create Time Slots
Create the slots (shifts) members book, such as Morning or Evening:
- Select a Preset to start from a ready-made set of slots, or
- Create Custom Slots with a Slot Label, Start Time, End Time and Price.
Presets fit your opening hours. Slots you add yourself should fall within them too.
Step 4: Add Users
Add your first members:
- Quick User Setup creates a few demo members so you can try bookings straight away.
- Add User Manually adds a real member with their name and email.
When all four steps are done, click Finish Setup.