Appearance
How to set up locker rentals
Who can do thisOwner, Org admin by default, or any staff role given Org Settings → Manage in Settings → Staff role permissions.
Steps
- In the left menu, click Settings.
- On the Organization tab, click Lockers.
- Turn on Enable lockers. Rentals run month to month by calendar date (for example the 15th to the 14th of the next month).
- Optional: turn on Show available lockers on reserve to let members choose a specific locker when they book. When it's off, they book without choosing. The locker is then assigned automatically if Auto-assign lockers after payment is on (see How online payments work), or by you from Lockers.
- Enter the Default locker rental price (₹). It applies to every locker that doesn't have its own price.
- Optional: turn on Charge one-time security deposit and enter the Security deposit amount (₹) and a Checkout label (the name members see at payment, such as "Security deposit").
- Click Save changes.
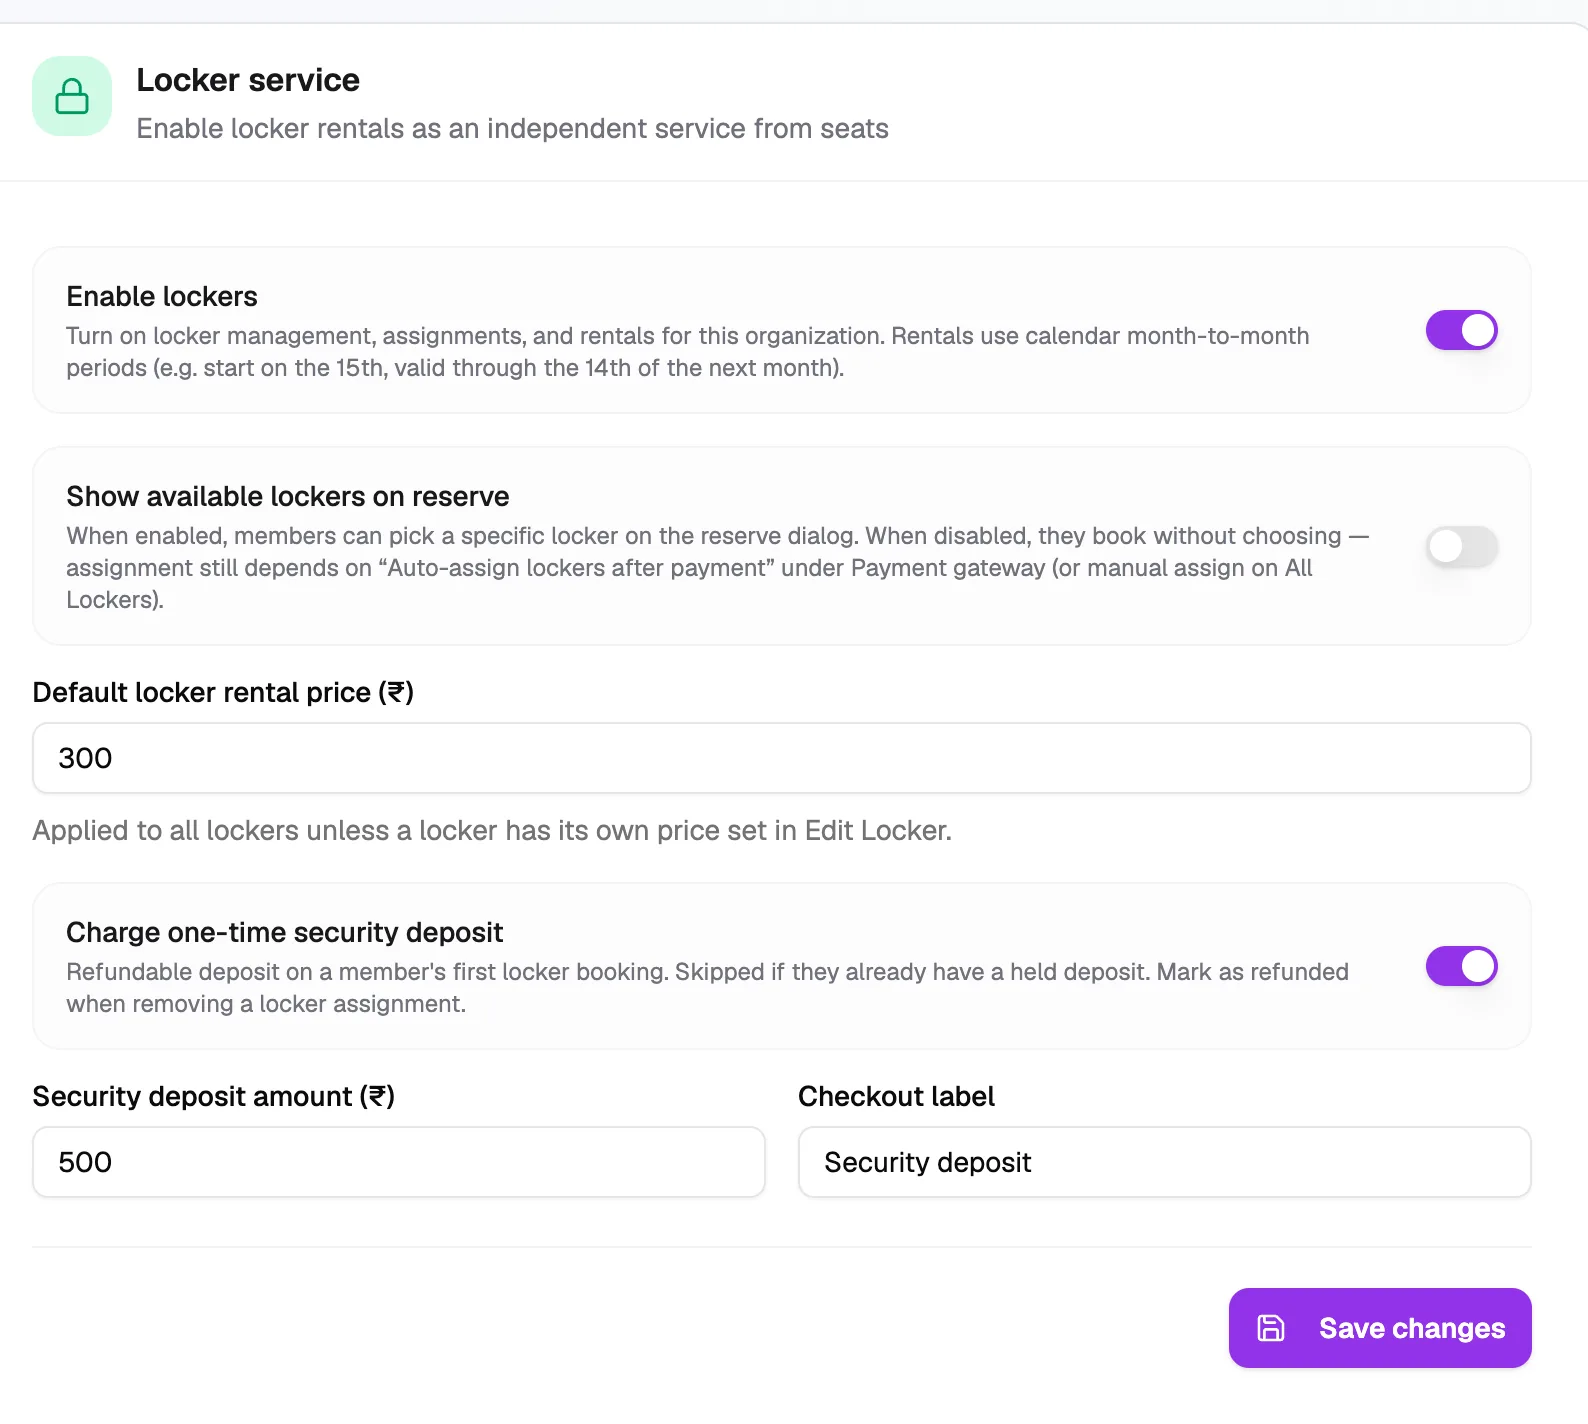
- Enable lockersTurns locker rentals on
- Show available lockers on reserveMembers choose a locker
- Default rental priceMonthly rent
- Security depositOne-time, refundable
- Deposit amount (₹)For example ₹500
How the security deposit works
- It's charged when a member's first locker rental is billed on a receipt or paid online, and skipped if they already have a deposit held.
- It's refundable. When you end the rental from the locker card, tick the box to mark it as refunded. See How to rent a locker to a member.