Appearance
How to set a custom UID pattern
Librarify creates a UID (student ID) for every new member. The UID pattern decides what those IDs look like, for example STU2610PI176.
Who can do thisOwner, Org admin by default, or any staff role given Org Settings → Manage in Settings → Staff role permissions.
Steps
- In the left menu, click Settings.
- On the Organization tab, click UID Generator.
- Choose a Generation method:
- Custom pattern: build the UID from parts, such as the year, month, random letters and numbers.
- Default template: start from a ready-made pattern for students or members.
- Serial numbers: simple running numbers, such as 0001, 0002, with an optional prefix or suffix.
- For a custom pattern, click Pattern components to add them in order. They appear under Your pattern. Click a part there to remove it, or Clear to start again.
- Optional: enter a Prefix (such as
STU), a Suffix, and a Separator between parts. - Check Live preview. It shows sample UIDs; click Regenerate for new samples.
- Click Save changes.
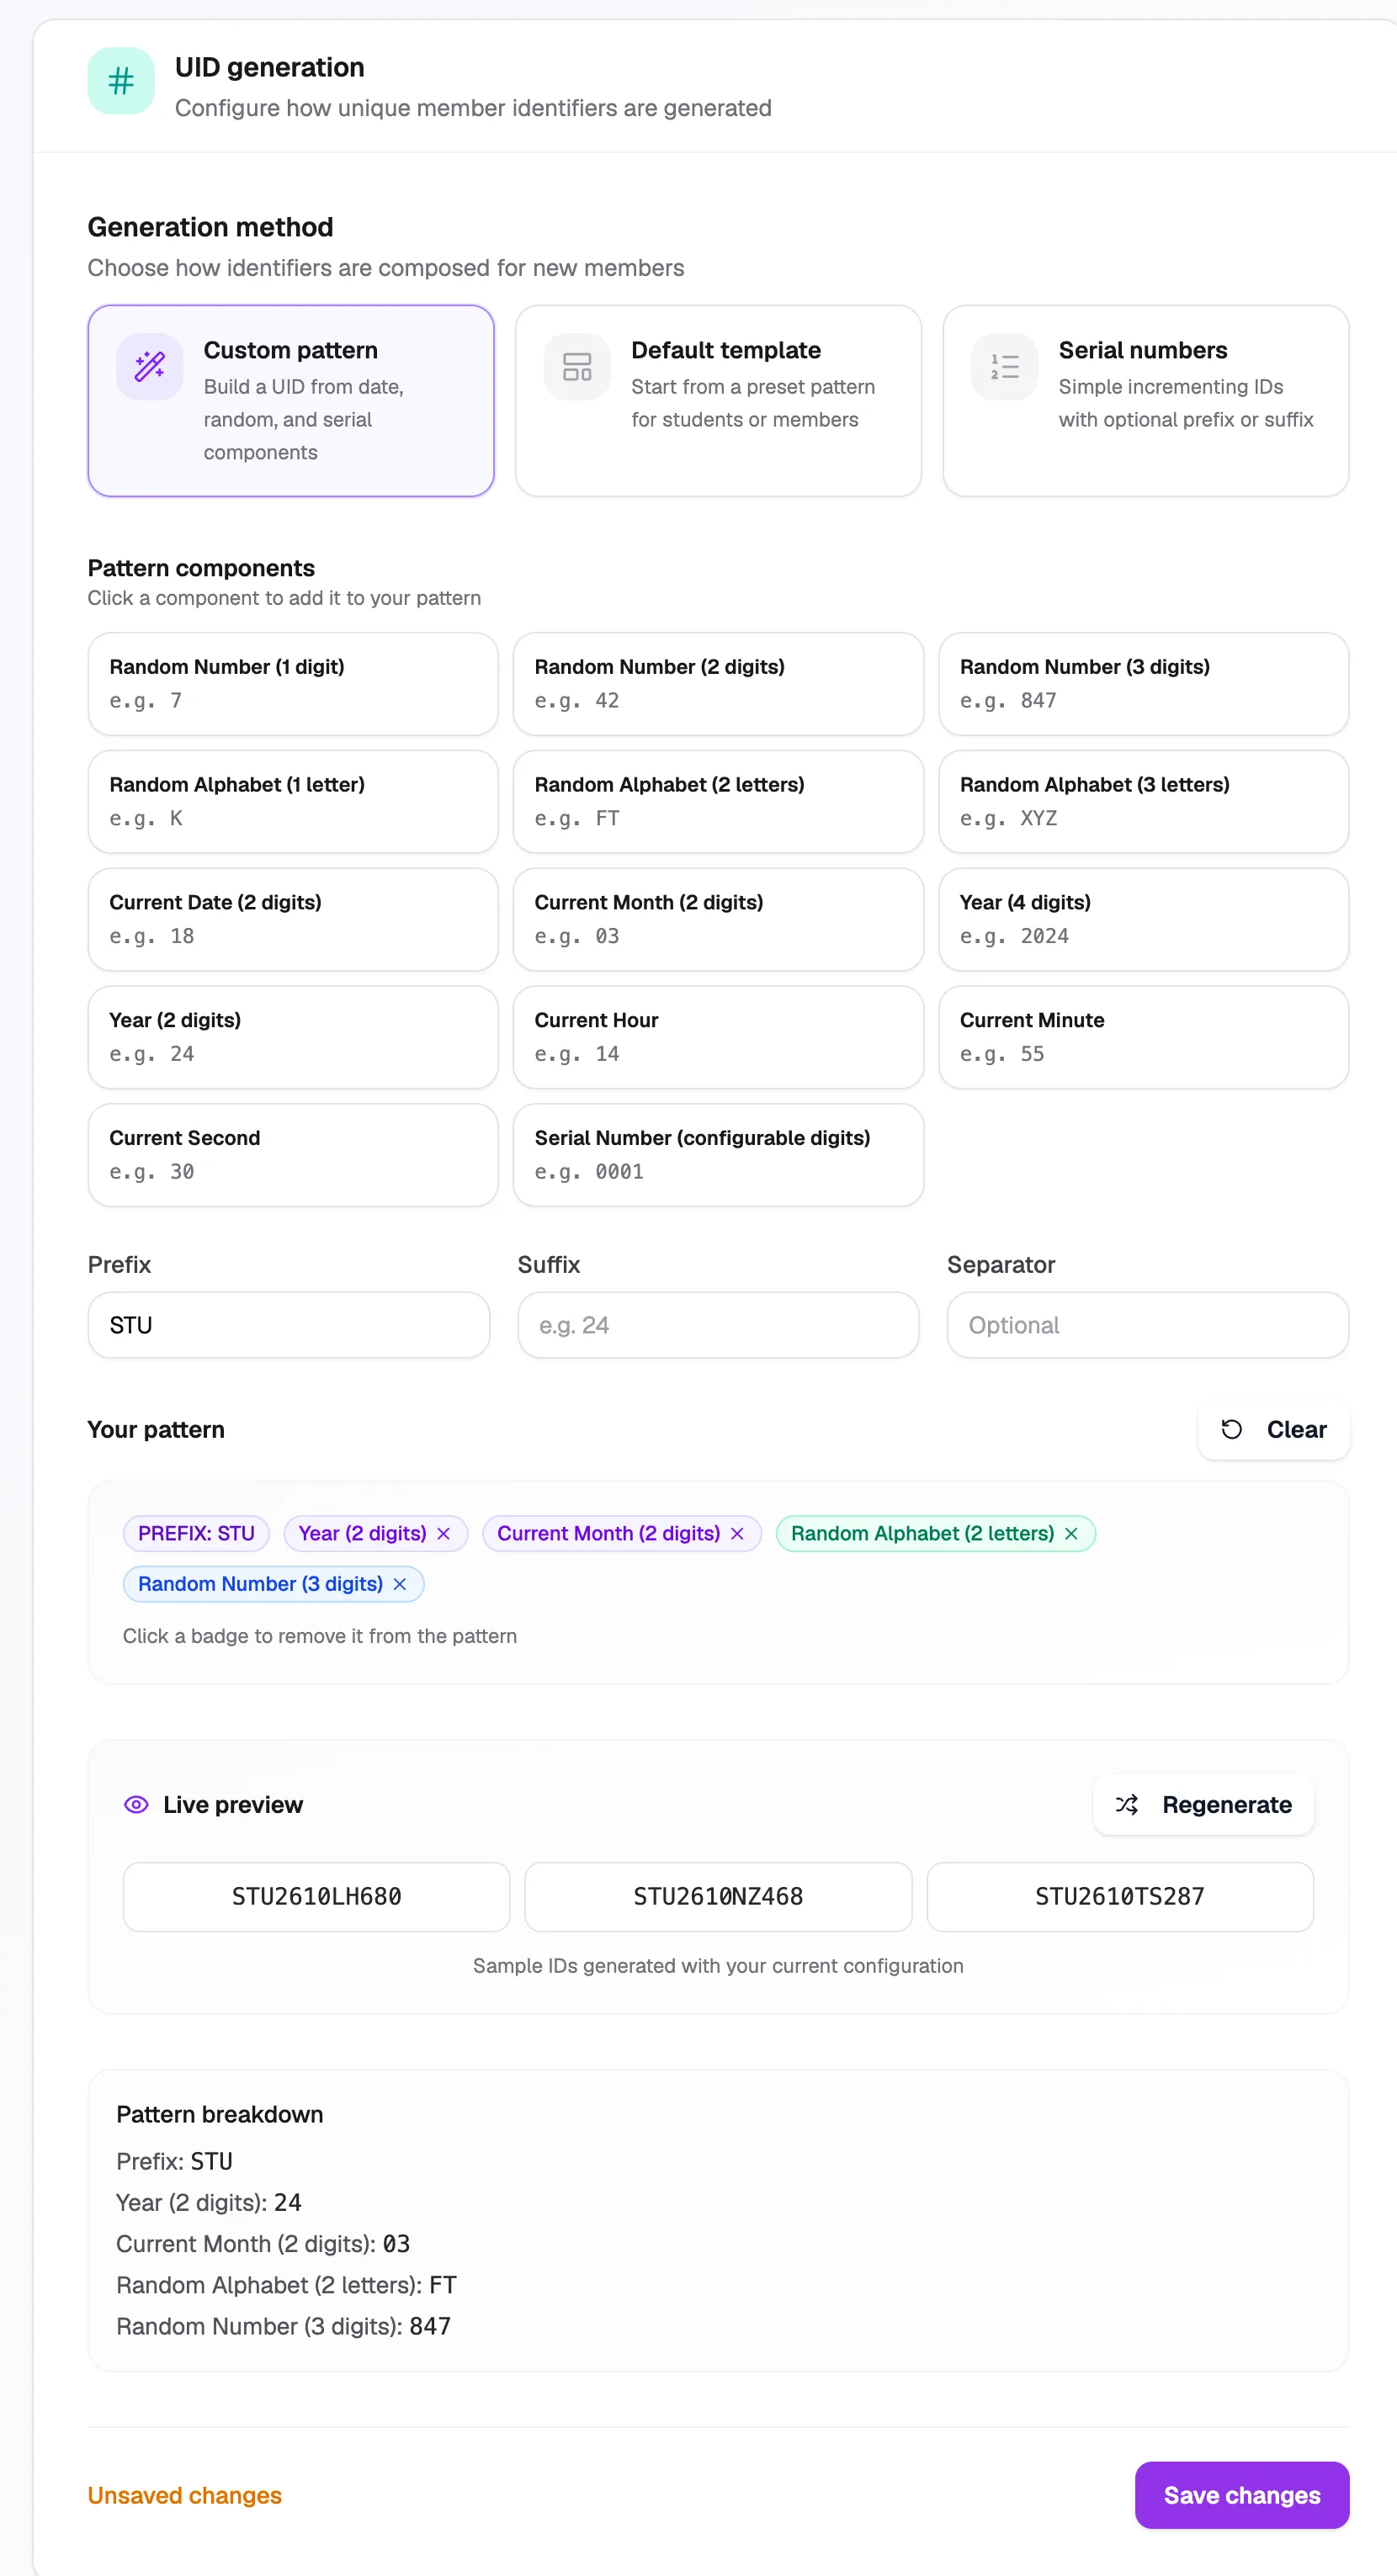
- Generation methodCustom, template or serial
- Pattern componentsClick to add a part
- PrefixText at the start, such as STU
- Live previewSample UIDs
- Save changesUse this pattern from now on
Pattern parts you can use
| Part | Example |
|---|---|
| Random Number (1, 2 or 3 digits) | 7, 42, 847 |
| Random Alphabet (1, 2 or 3 letters) | K, FT, XYZ |
| Current Date (2 digits) | 18 |
| Current Month (2 digits) | 03 |
| Year (4 or 2 digits) | 2024, 24 |
| Current Hour, Minute, Second | 14, 55, 30 |
| Serial Number (choose the number of digits) | 0001 |
Example: prefix STU + Year (2 digits) + Current Month + Random Alphabet (2 letters) + Random Number (3 digits) gives UIDs like STU2610PI176.
What happens next
- New members get a UID in the new format.
- Existing members keep their UIDs. To move one to the new format, regenerate their UID.