Appearance
How to change the receipt template and terms
Choose how receipt PDFs look, what contact details they show, and the terms printed on them.
Who can do thisOwner, Org admin by default, or any staff role given Org Settings → Manage in Settings → Staff role permissions.
Steps
- In the left menu, click Settings.
- On the Organization tab, click Receipt Generator.
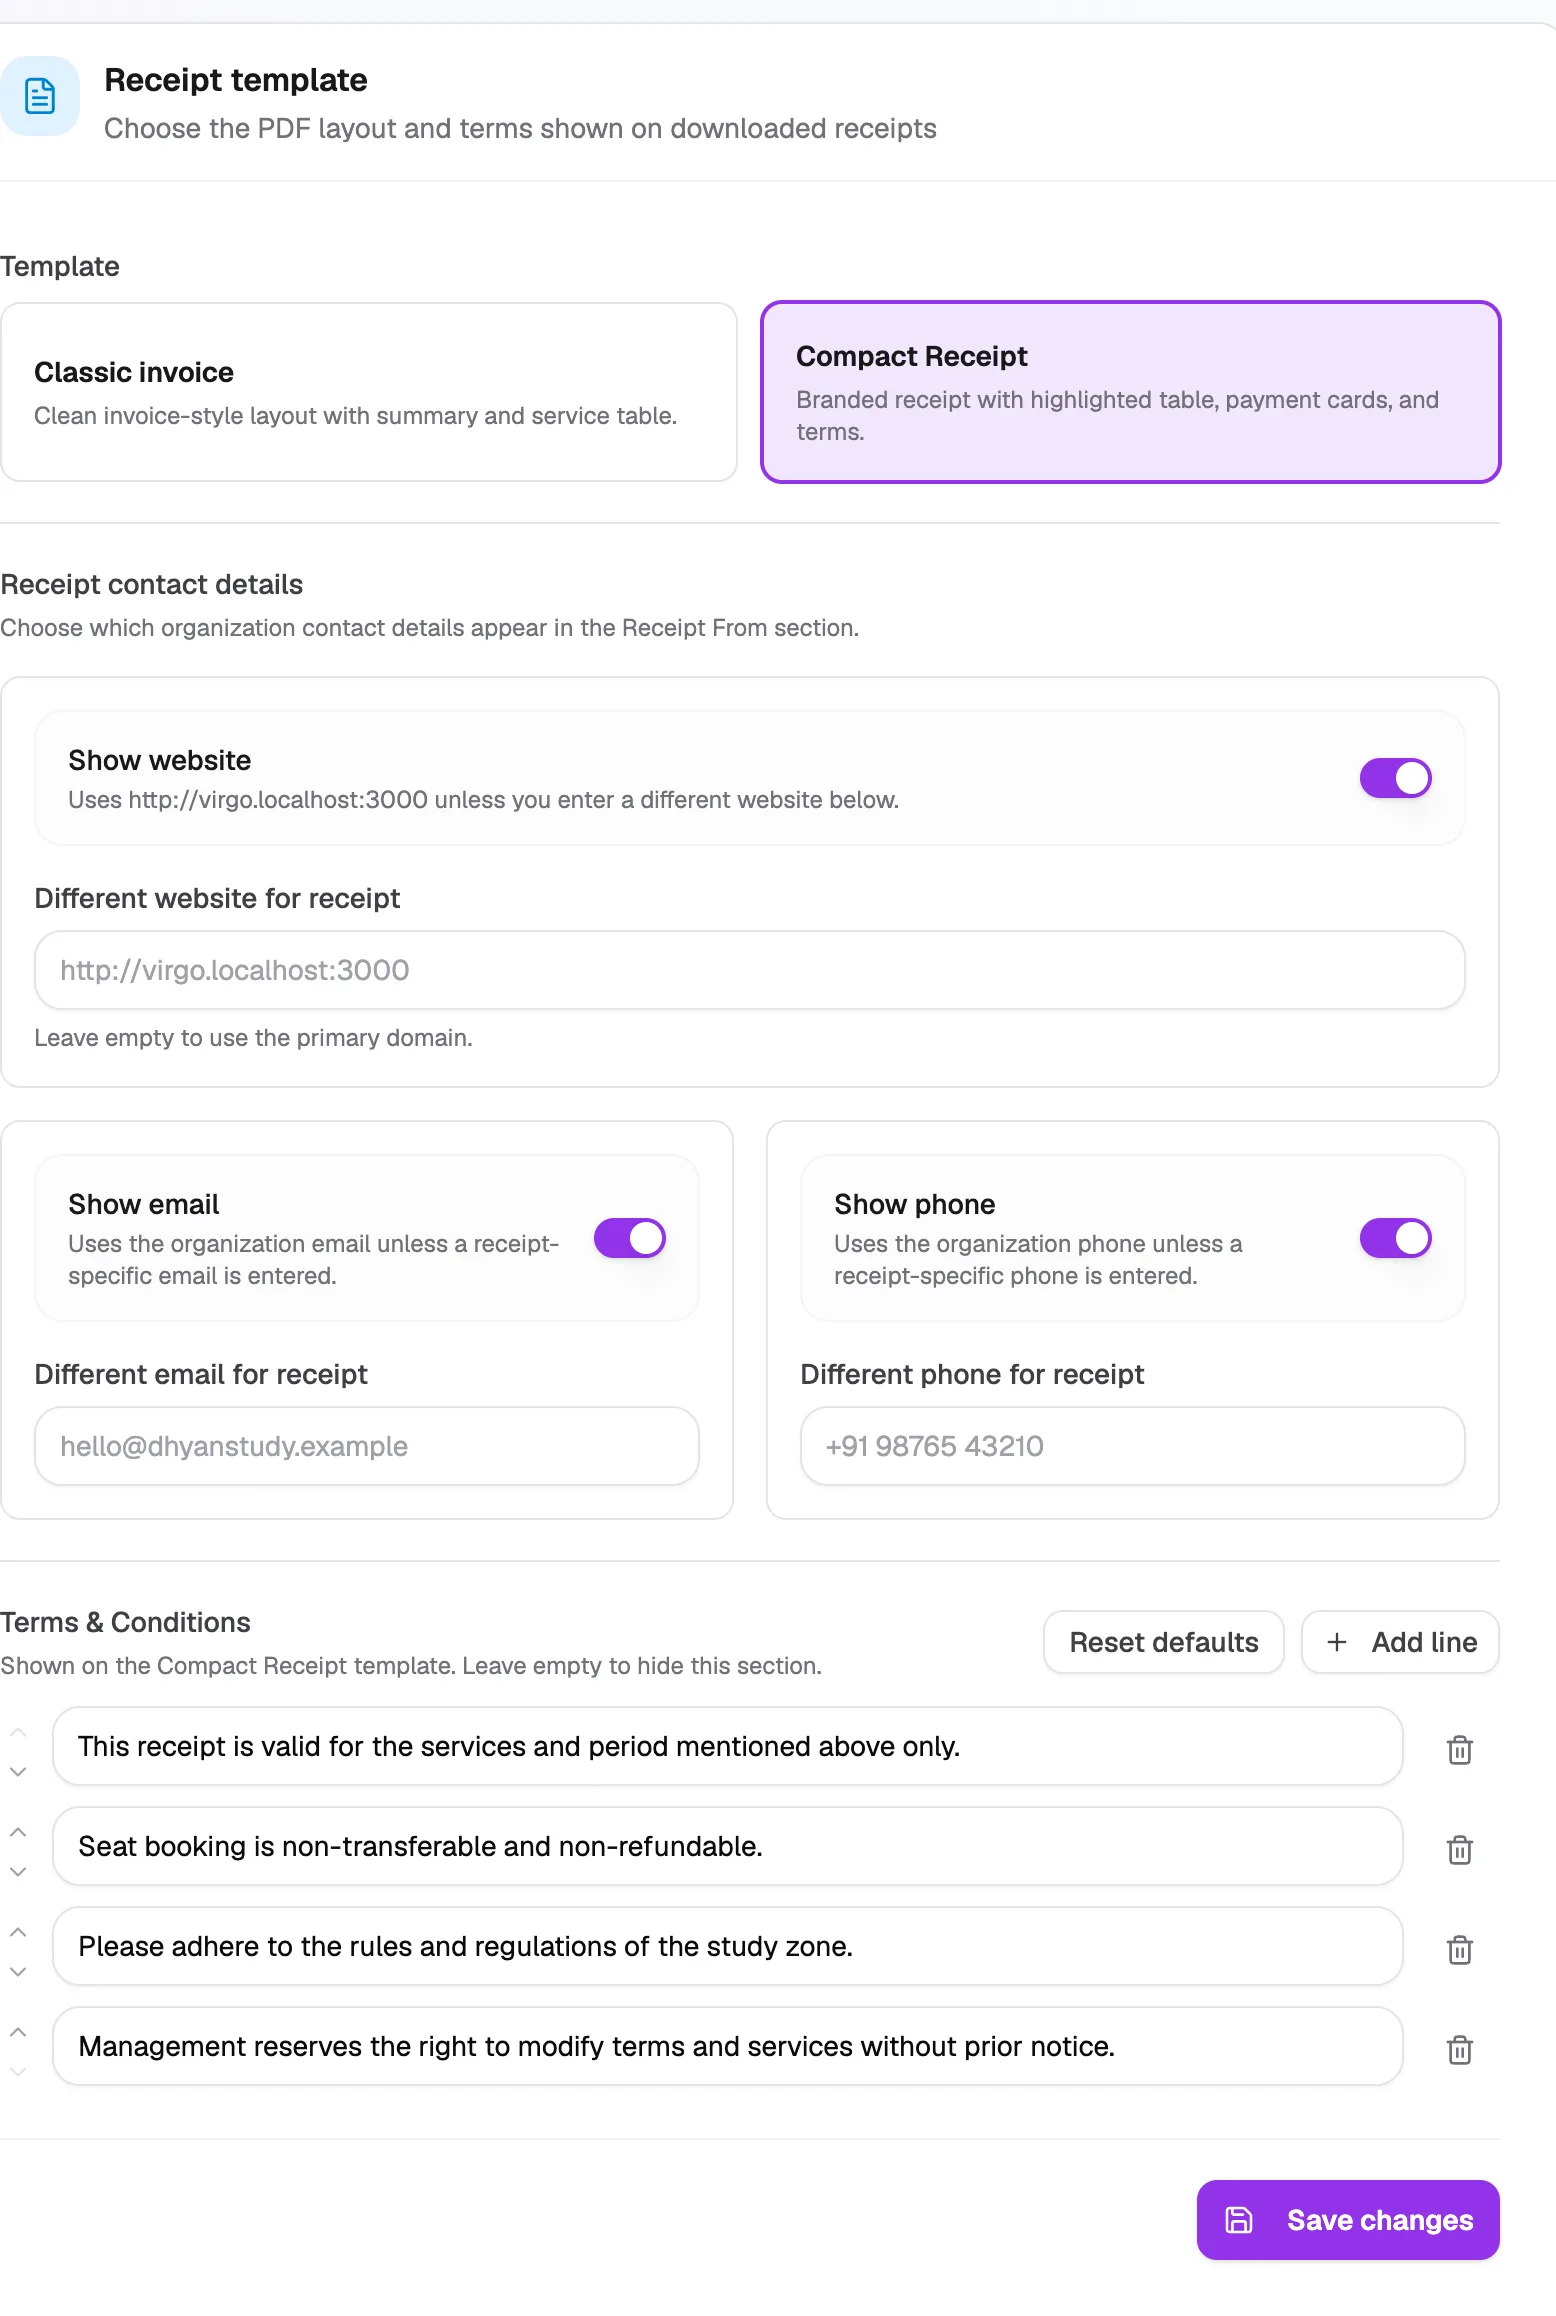
- Under Template, choose Classic invoice (invoice-style layout with a summary and service table) or Compact Receipt (branded receipt with a highlighted table, payment cards and terms).
- Under Receipt contact details, turn Show website, Show email and Show phone on or off. To print a different website, email or phone on receipts, type it in the box under each one.
- Under Terms & Conditions, edit the lines. Use Add line, move lines up or down, or remove them. Reset defaults restores Librarify's standard terms.
- Click Save changes.
- Classic invoiceInvoice-style layout
- Compact ReceiptBranded layout with terms
- Contact detailsChoose what receipts show
- Add lineAdd a term
- Save changesApplies to new PDFs
Terms are shown on the Compact Receipt template. Leave them empty to hide the section.