Appearance
How to rent a locker to a member
Who can do thisOwner, Org admin, Moderator by default, or any staff role given Lockers → Operate in Settings → Staff role permissions.
Rent a locker
- In the left menu, click Lockers, then click Available to see free lockers.
- On the locker you want, click Assign locker.
- In Rent Locker, enter the member's Email.
- Check the Rental period. It starts today and runs one calendar month, for example the 15th to the 14th of next month. Change the dates if you need to.
- Check the Rental price (₹), then click Assign locker.
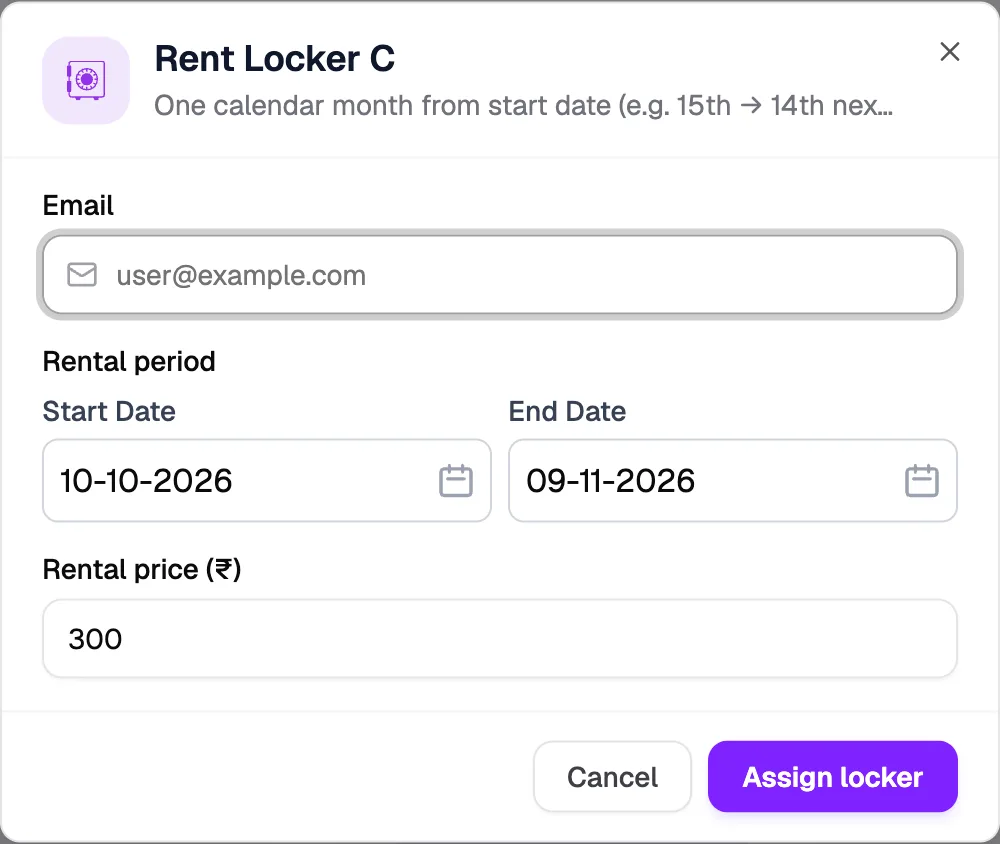
- EmailThe member's email
- Rental periodOne calendar month by default
- Rental price (₹)From the locker or library default
- Assign lockerStarts the rental
You see "Locker assigned successfully". Assigning a locker doesn't charge anything by itself. If your library charges a security deposit, it's added when the member's first locker rental is billed on a receipt or paid online, and then shows as held.
See and renew rentals
In the left menu, click Lockers → Locker assignments. Each rental shows the locker, member, dates, price, deposit and status.
To renew, click Renew on the rental. In Renew Locker Rental, set the New valid-through date, the Payment amount (₹) and the Payment method (Offline, Cash, UPI or Bank transfer), add notes if you like, and click Renew locker.
End a rental and refund the deposit
To end a rental and refund the deposit, use the locker card:
- On Lockers, click Rented, then View assignment on the locker.
- Under the current rental, tick Refund security deposit. It shows the amount held, for example "Mark ₹500 as refunded when removing this assignment". Optional: add Refund notes, such as "Returned at front desk".
- Click Remove assignment.
Deactivate keeps the deposit
Deactivate on the Locker assignments page ends the rental straight away, with no confirmation, and does not refund the deposit. Use the locker card when the member should get their deposit back.