Appearance
How to add lockers
Lockers are rented to members by the month, separately from seats. Add them here, then rent them to members.
Who can do thisOwner, Org admin by default, or any staff role given Lockers → Create / edit in Settings → Staff role permissions.
Before you start
Turn lockers on in Settings → Organization → Lockers. See How to set up locker rentals.
See your lockers
In the left menu, click Lockers. Each locker shows its label, number, monthly Rental price and Security deposit. Filter by Available, Rented or Expired.
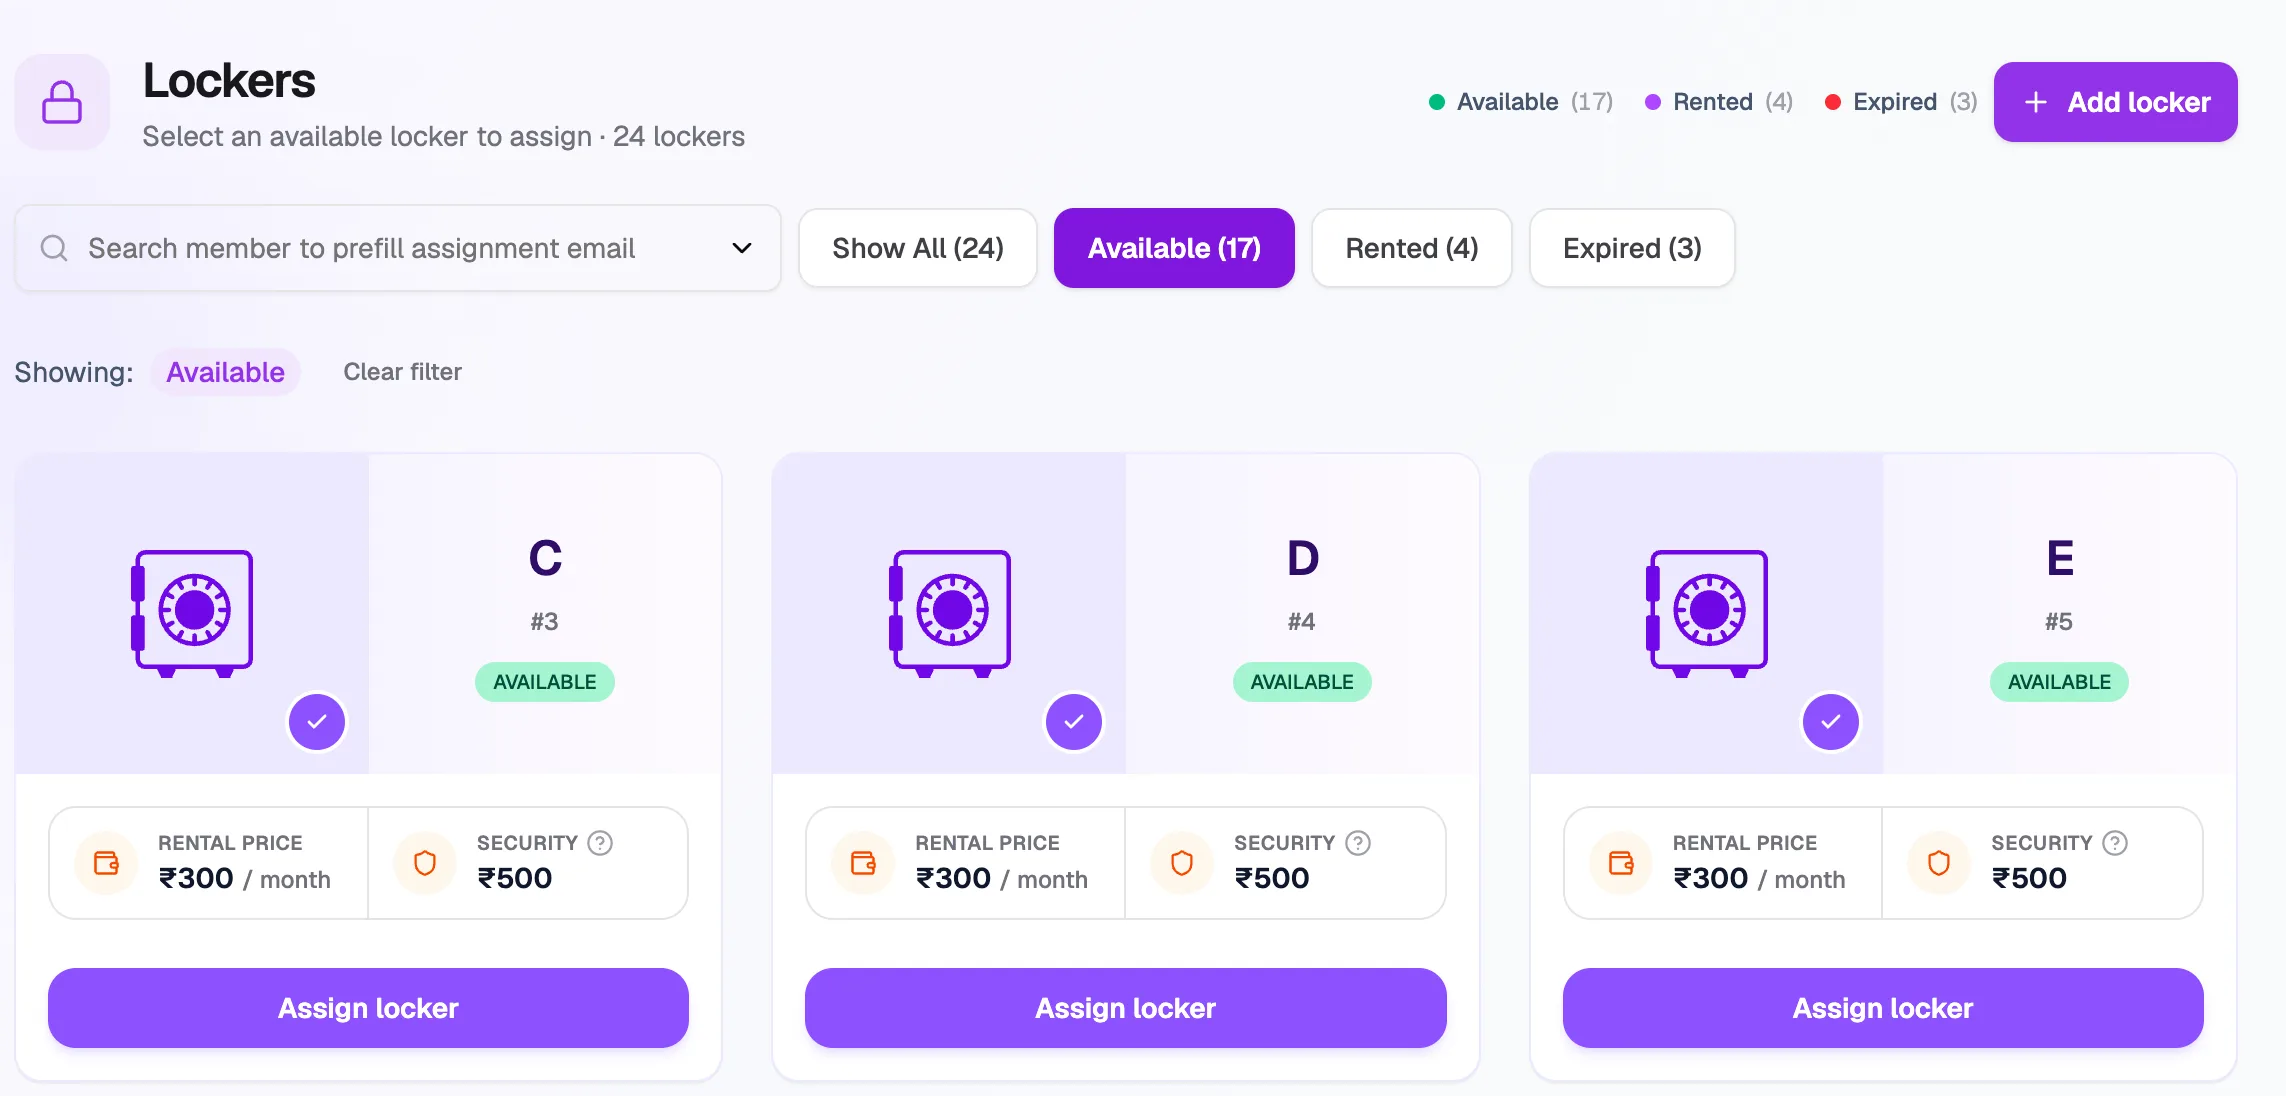
- Add lockerCreate lockers
- FiltersAvailable, rented or expired
- Rental priceMonthly price and deposit
- Assign lockerRent it to a member
Add one locker
- On Lockers, click Add locker.
- Keep Single locker selected.
- Enter a Label, such as
L-01, and optionally a Description, such as "Ground floor, near entrance". - Optional: enter a Default price (₹) for this locker. Leave it empty to use your library's default rental price.
- Click Create locker.
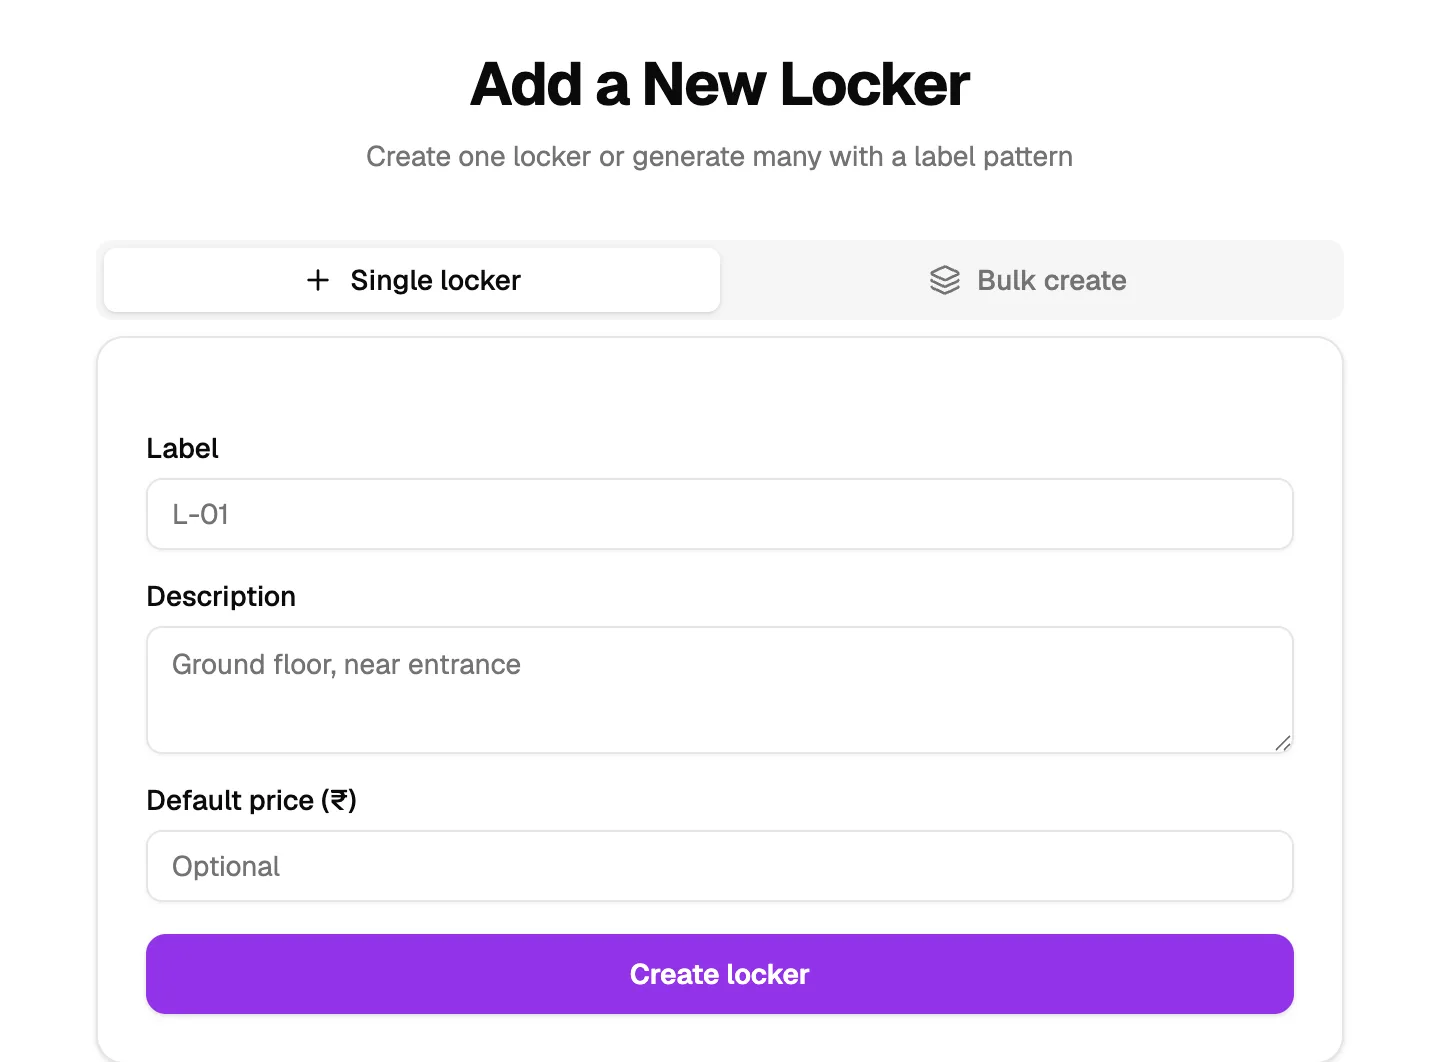
- Single lockerOne at a time
- Bulk createA whole row
- LabelFor example L-01
- Default price (₹)Empty = library default
- Create lockerSaves it
Add many lockers at once
- Click Bulk create.
- Choose the Label type, such as Numeric, and the Starting value.
- Enter the Number of lockers and an optional shared Description.
- Click Create lockers.
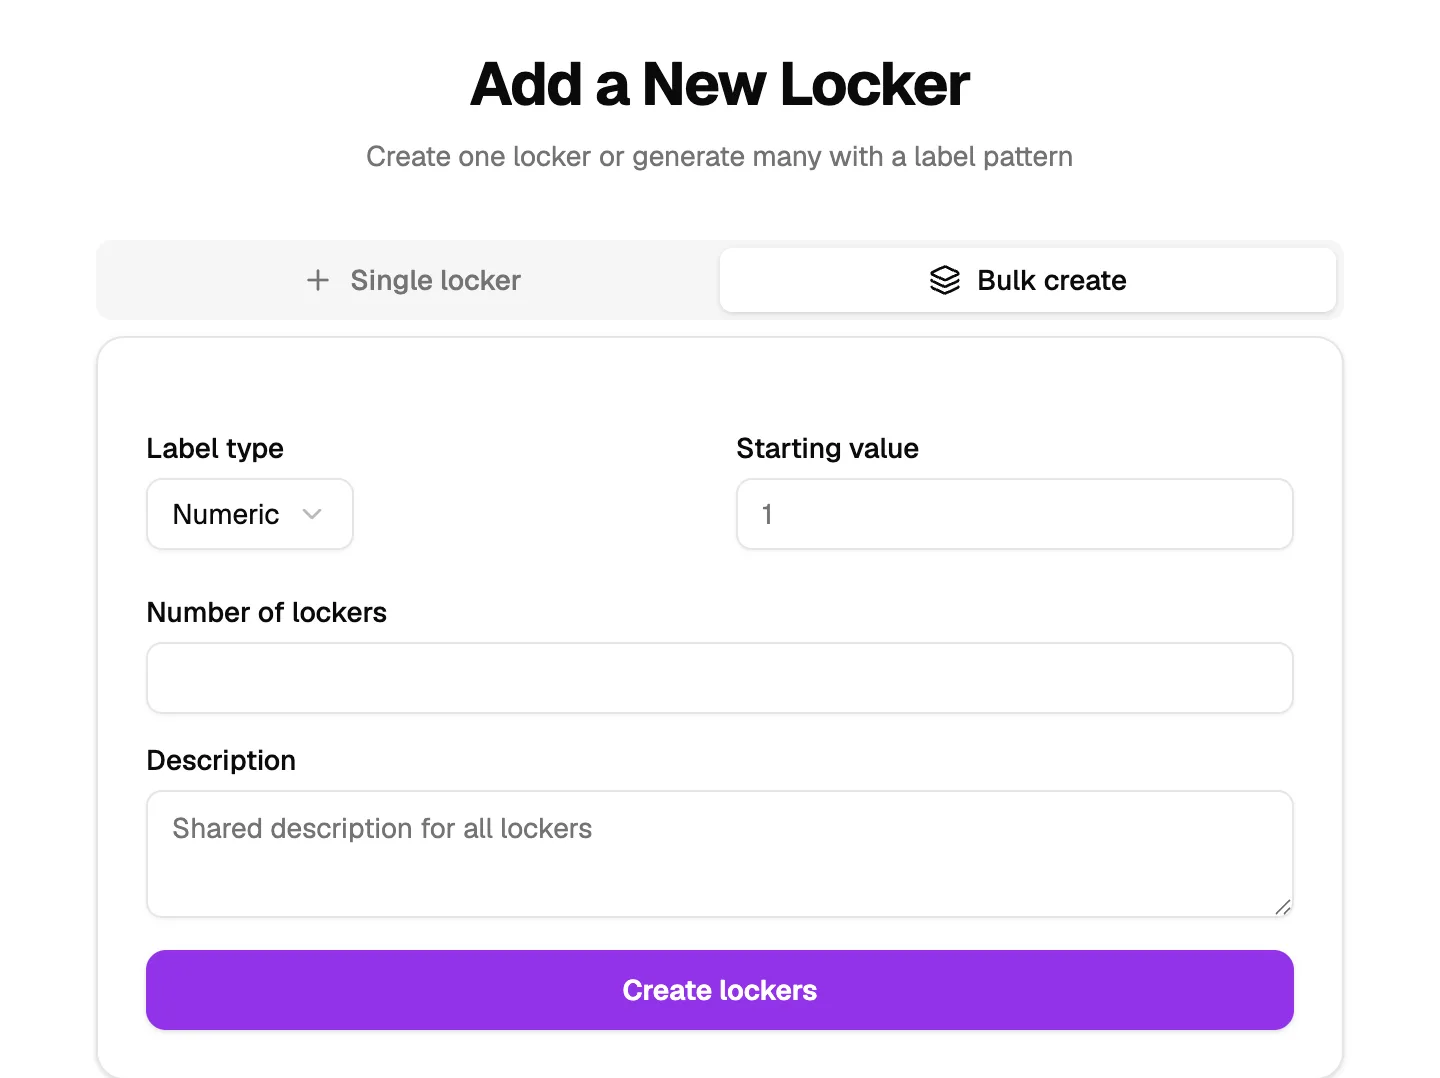
- Label typeNumbers or letters
- Starting valueThe first label
- Number of lockersHow many to make
- Create lockersCreates the row